


As a registered dietitian, I get asked all the time which healthy desserts are actually worth making, and this Ninja Creami protein ice cream recipe is at the top of my list. It's a flexible formula with around 38g of protein per pint that I genuinely recommend to clients.
What makes it different from the dozens of Ninja Creami recipes online is that it's built like a formula, not a fixed recipe. You can swap the milk, the protein source, or the thickener depending on what you have, and it still turns out creamy every time.

When I'm working with clients on their health goals, I'm usually slow to recommend recipes that need a new appliance. But the Ninja Creami has been a rare exception and this recipe is exactly why.
You can follow my exact recipe, or tweak it to fit your own nutrition and fitness goals.
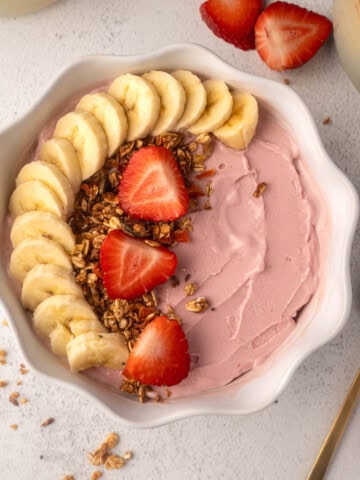
If you enjoy this recipe you will also love my Snickers Yogurt Cups, they have a similar ice-creamy vibe. Or try my Ninja Creami smoothie bowl next for a fun, high-protein breakfast idea.
And let me know in the comments if there’s a specific Ninja Creami flavor you’d like me to make next!
Jump to:
- Why This Recipe is Dietitian Approved
- Dietitian Note: Is Ninja Creami Protein Ice Cream Healthy?
- Will This Recipe Help Me Lose Weight?
- Key Ingredients
- How To Make Protein Ice Cream in the Ninja Creami
- Equipment
- Storage
- Flavour Variations
- Serving Suggestions
- Troubleshooting Common Ninja Creami Issues
- Expert Tips for Making This Recipe
- FAQ
- More Ninja Creami Recipes You'll Love
- Nutrition Information
- 📖 Recipe
- 💬 Comments
Why This Recipe is Dietitian Approved
There are so many Ninja Creami protein ice cream recipes out there, but most of them have at least one problem. They're either too icy, rely heavily on pudding mixes and artificial ingredients, or need multiple re-spins just to get a decent texture. This one is different.
Here's why I keep coming back to it:
- It packs in around 38g of protein per pint with my go-to toppings, plus a good dose of calcium, which supports bone health (especially important for women!).
- Regular tubs of ice cream can have over 1,000 calories. This version is much lower in calories and far more satisfying.
- You can leave out the gums, sweeteners, or stabilizers if you prefer, and still get creamy, delicious results.
- It works for almost every preference, whether you are dairy-free, want even more protein, or are picky about flavours (no judgment!).
Dietitian Note: Is Ninja Creami Protein Ice Cream Healthy?
Healthy is all about context. There’s nothing wrong with having some Ben & Jerry’s now and then especially if the rest of your diet is balanced and you’re enjoying it mindfully.
But this Ninja Creami protein ice cream is a great option if you want a healthier dessert recipe you can enjoy more regularly. It's high in protein, lower in calories and sugar than traditional ice cream, and gives you that creamy experience without needing to wait for the weekend.
So while it is not about labelling foods as "good" or "bad," this recipe is a more nutrient-dense choice. It's also a great way to help you hit your daily protein target.
Will This Recipe Help Me Lose Weight?
It can definitely support your weight loss goals, but just like anything, it depends on your overall diet and habits.
That said, this recipe is a perfect example of what I always recommend: finding low calorie meals and snacks that you actually enjoy. When you do that, everything becomes so much more doable.
Some pints of traditional ice cream can have over 1,000 calories. This version is much lower in calories while still being satisfying and high in protein, so it helps curb cravings and keeps you fuller for longer.
It’s the kind of treat that makes weight loss feel less restrictive and more like something you can actually stick to long term.
Key Ingredients
Below are some ingredient notes. For the exact ingredient measurements and the full recipe, be sure to check the printable recipe card at the bottom.

Base liquid
Pick one:
- Dairy milk – whole, low-fat, or skim
- Fairlife or other high-protein milk – for an extra protein boost
- Unsweetened soy, cashew, or barista-style oat milk for a dairy-free option
If you are using a plant-based milk, try to choose one that is fortified with calcium. And if you are looking for a creamier result, go for something with a little fat. Higher-fat milks help prevent ice crystals and give you that proper soft-serve texture.
Dairy milk gives the creamiest, most ice-cream-like result. If you are lactose intolerant, you can use lactose-free milk and still get the same nutrition.
For creaminess:
Add one or two of the following:
- ½ a ripe banana (approx. 50g). This is a great option if you want to avoid gums or pudding mixes.
- ¼ of an avocado
- 1 tablespoon of cream cheese
- ⅛ teaspoon xanthan or guar gum. This helps with that soft-serve texture. Some professionals recommend using guar gum over xanthan gum in cold foods but I find guar gum harder to find in stores.
- or
- 5g sugar-free pudding mix (vanilla or banana work great)
The xanthan gum & pudding mix work by preventing ice crystals and makes everything much creamier.
For extra protein:
Add one or more of the following:
- Protein powder. Most people use just whey, but casein gives a much thicker, creamier texture. You can use half whey and half casein or get a blend.
- You can use a plant-based protein powder, but please note, it usually gives a grainier texture and may not blend quite as smoothly. That said, if you're used to it or prefer plant-based, it still works!
- Cottage cheese or Greek yogurt (blend well so it’s smooth)
If you are not sure which protein powder to grab, my dietitian's protein powder guide walks through the options.
Optional pre-freeze flavor boosters:
- A few drops of vanilla extract or other flavoring
- Sweetener to taste (if your protein powder isn’t sweet) e.g., stevia, honey, maple syrup
- A dash of cinnamon or cocoa powder
- Berries or frozen fruit
- A pinch of salt to enhance sweetness
Cold foods taste less sweet, so you can be a little generous with the sweetener.
After-freeze mix-ins:
Add these at the end
- A protein bar chopped into pieces (I love Fulfil and Barebells)
- A drizzle of your favorite nut butter
- Chocolate chips, peanut butter cups, pretzels, or whatever you’re into!
- Berries or chopped fruit
- Puffed rice or your favorite cereal
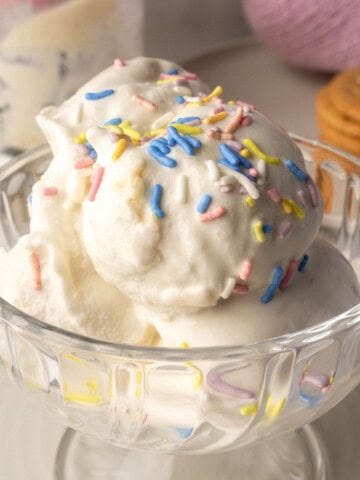
Or spoon your ice-cream into wafers and have an ice-cream sandwich!
How To Make Protein Ice Cream in the Ninja Creami
Below are the simple steps for how to make this ninja creami recipe with visuals I hope are helpful! Don't forget to check out the recipe card at the bottom for the full recipe.

- Step 1: Blend your base.
Using a blender or milk frother combine your milk of choice, protein powder, and creaminess booster. If you're using Greek yogurt or cottage cheese, make sure to use a blender to avoid any lumps. Add your flavor extras in at this stage too.

- Step 2: Freeze for 24 hours.
Pour your mix into a Ninja Creami pint container, and freeze upright for 24 hours. If short on time freezing for 12 hours will work too but the texture may not be as good. Freezing with the lid off helps avoid that annoying “dome” that often forms.

- Step 3: Soften slightly before spinning to help it blend smoothly and avoid icy edges. I usually just let it sit at room temperature for 5-10 minutes or run the container under warm water for about 30–60 seconds until the sides start to loosen. Another option is to pop it in the microwave for 10-20 seconds or add to a warm water bath.

- Step 4: Spin it
Place the container into your Ninja Creami machine and run the Lite Ice Cream cycle. Check the texture. If it looks powdery or crumbly, add a splash of milk and give it another re-spin. If needed, spin it a second time. I’d avoid going beyond two re-spins — if it's still not working, something might be off with the base.

- Step 5: Add mix-ins. Make a hole in the centre of the ice cream, add your chopped protein bar and peanut butter (or whatever mix-ins you're using), and run the Mix-In cycle. Or simply mix them in by hand!

- Step 6: Serve and enjoy!
I recommend eating it all straight away. You can freeze leftovers and re-spin later but the consistency is never as good as the initial creation.
Hint: I usually make just one serving per container as it helps with portion control. If I make double, I will eat double (they’re that good!). Plus, as I mention in Step 6, leftovers never quite re-spin the same. If I ever figure out a fix for that, I’ll be sure to let you know!
Have fun and experiment with different ingredients but always remember to stay under the max fill line! I don't want to be responsible for any broken ninjas!
Equipment
You have to blend your base until it is completely smooth before freezing. There are no lumps allowed in the machine. The Ninja Creami won't work properly if there are any chunks.
I use my Ninja Foodi blender to combine my creations before freezing, but any blender or smoothie maker should work. That said, if you’re only using milk and protein powder, a milk frother does the trick and means less cleanup.
You’ll also obviously need a Ninja Creami! I have the regular model and honestly, it does everything I need. Unless you want the extra bells and whistles, the basic version is more than enough.
- Ninja Creami Original NC301. This is the one I have. It uses a 16 oz (470ml) pint and does everything I need.
- Ninja Creami Deluxe. Uses a larger 24 oz container. If you are making bigger batches or feeding a household, this might suit you better. You will need to multiply the recipe by 1.5x.
- Ninja Creami Swirl. Newer soft-serve style model. Works for this recipe but produces a slightly different texture.
I’d also recommend buying a few extra pint containers, just make sure they’re compatible with the model of Ninja Creami you have. I love having extras on hand because I usually prep a bunch at once, either in one go or as part of my weekly meal prep.
Storage
I recommend eating it straight away if you can (this is why I usually just make one serving at a time per container).
You can refreeze and re-spin it later, but in my experience, it never turns out quite as good as the first time around.
Please comment below if you have discovered any tricks for this!
Save This Recipe! 💌
Flavour Variations
Vanilla: Use vanilla protein powder, a few drops of vanilla extract, and sugar-free vanilla pudding mix. Classic and works with almost any topping.
Chocolate: Use chocolate protein powder and add 1 tablespoon of cocoa powder to the base. Top with peanut butter or chocolate chips.
Strawberry: Use vanilla protein powder, blend in 50g of frozen strawberries, and a few drops of vanilla extract. Beautifully pink and naturally sweet.
Peanut Butter: Use vanilla protein powder, add 1 tablespoon of peanut butter to the base, and top with more peanut butter and chopped peanuts.
Coffee: Add 1 to 2 teaspoons of instant coffee or espresso powder to the base. Excellent with chocolate chips folded in.
Lemon or Pistachio: Some of my favourites. Use sugar-free lemon or pistachio pudding mix in the base. Use lemon curd or crushed pistachios as a topping.
If you want even more inspiration on perfecting your texture, my full Ninja Creami tips guide will help you with any flavour.
Serving Suggestions
There are SO MANY ways to enjoy your ninja creami. Some toppings I love:
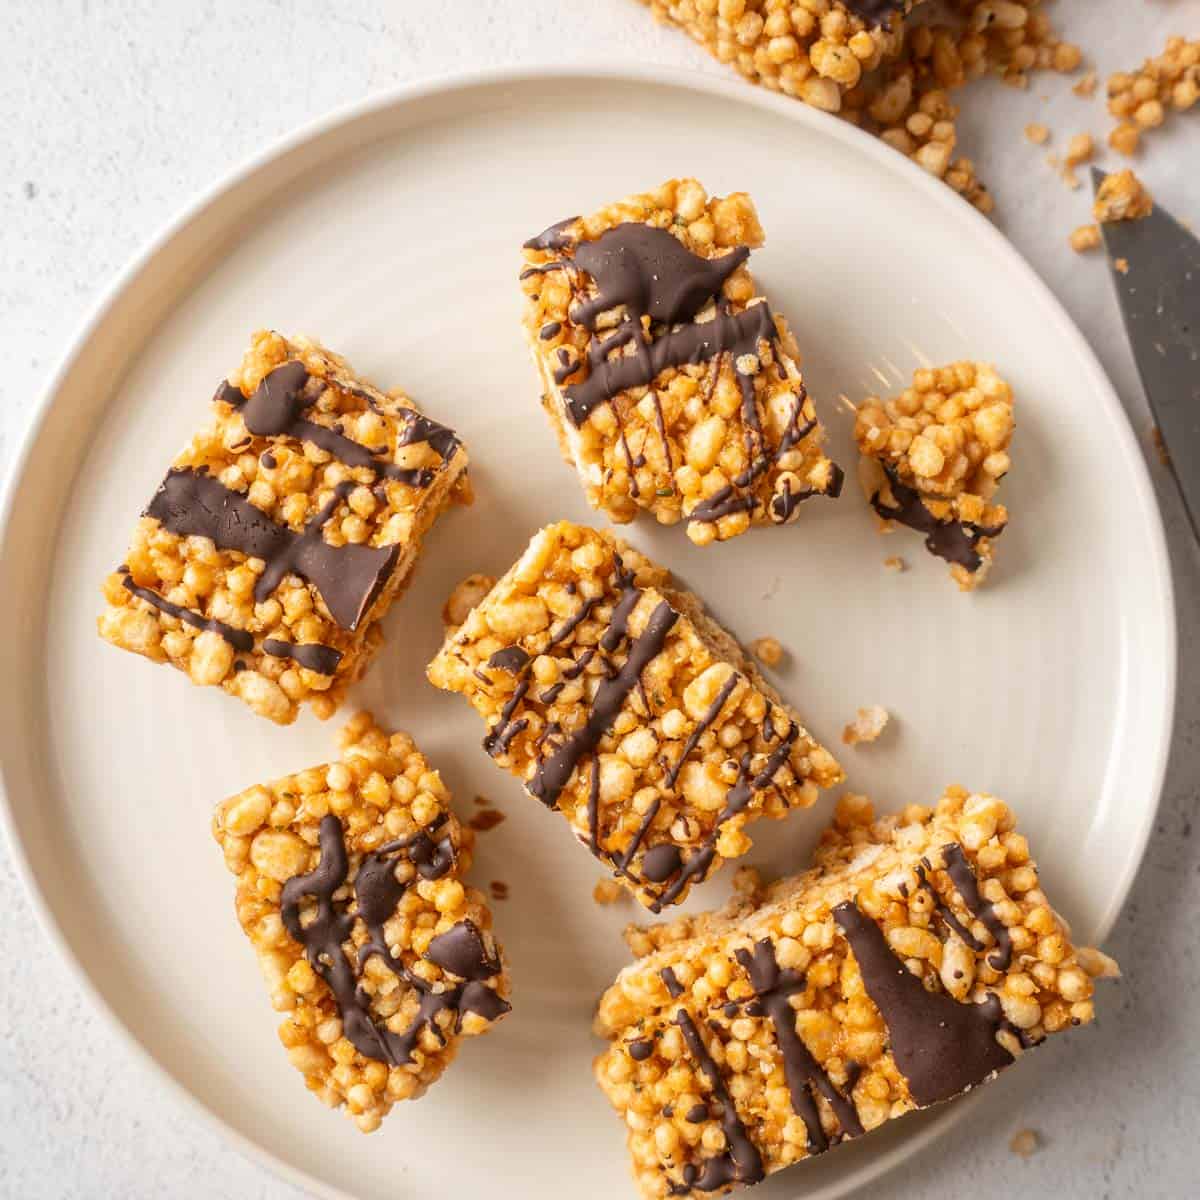
- crumbled up pieces of my healthier rice krispie treats or protein crisp bars
- berries or air fryer apples
- a chopped up protein bar
- chocolate chips
- mini eggs
- chopped nuts
- a drizzle of nut butter
- puffed rice or low-cal cereal for crunch and volume
Or if you have a little more time, it is incredible topped with my date and peanut butter caramel sauce.
You can also try it as the filling for an old-fashioned ice cream sandwich, or layered with homemade chia berry jam for a swirl of fruit flavour.
Troubleshooting Common Ninja Creami Issues
If your ice cream did not turn out the way you wanted, do not worry. These are the most common issues and how to fix them.
Why is my Ninja Creami protein ice cream too icy? Almost always a low-fat ingredient issue. Switch to a higher-fat milk (whole milk or barista-style oat) or add a small amount of cream cheese, avocado or banana. Also make sure your base is fully blended and the pint is frozen on a level surface for at least 24 hours.
Why is it crumbly or powdery after spinning? This is usually freeze time or fat content. The pint needs to be solid all the way through. Run a butter knife around the edges to loosen it, add 1 to 2 tablespoons of milk, and run the Re-Spin cycle. That fixes it 9 times out of 10.
Why won't my pint spin? It feels too hard. Let it sit at room temperature for 5 to 10 minutes before spinning. If it is still too hard, run warm water around the outside of the container for 30 to 60 seconds. Never force the machine.
Why is it not creamy enough? The respin is your best friend. One spin processes the pint, but the second is what gets you that smooth, creamy result. Add a splash of milk before the second spin if needed.
Expert Tips for Making This Recipe
Try to give it the full 24-hour freeze if you can. It’s not strictly necessary, but it definitely gives a better texture. That said, I’ve still had good results with just 12 hours.
Freeze with the lid off. This helps avoid the annoying “dome” that forms and can damage your machine.
I highly recommend using dairy milk if you can - it will give the creamiest most ice-cream like texture.
If your machine struggles on the first spin, just add a splash of milk and hit re-spin. Easy fix!
Get creative and experiment with different ingredients until you find your own go-to mix. Just make sure to stay under the max fill line.
FAQ
The loud noise is normal. The Ninja Creami is shaving through a fully solid block of frozen ingredients. It sounds similar to a high-powered blender crushing ice. As long as the noise is consistent and not a grinding metal sound, it is fine.
I usually use vanilla casein or a whey-casein blend. They both blend well and give a creamy texture. Casein is the creamier of the two. Plant-based powders work too but can be slightly grainier.
Swap the pudding mix for half a banana, ¼ of an avocado, 1 tablespoon of cream cheese, a pinch of xanthan gum or a spoonful of Greek yogurt or cottage cheese (blended well). All of these give a creamy texture without any extras.
Yes, but it can result in a slightly icier texture as most plant based milks are fat free. You can offset the icy texture by using a banana, xanthan gum, or a higher-fat plant milk like cashew or barista-style oat.
No, you can use Greek yogurt or cottage cheese instead to add extra protein to your creami (just make sure to blend them well). Using a dairy milk also provides about 8 grams of protein per glass and you can add extra protein by choosing your toppings wisely e.g., a chopped up protein bar, a sprinkle of hemp seeds or a drizzle of peanut butter.
Yes. According to Ninja, the dessert tubs and lids are BPA-free and microwave safe. So you’re good to go.
Yes. A Fairlife or Core Power shake mixed with a little pudding mix or banana works well as a shortcut. The protein and calorie totals will depend on the shake you use. I have also used an ensure in the creami with great success!
Lite Ice Cream is for lower-fat or lower-sugar bases (like this one). Regular Ice Cream is for full-fat, full-sugar bases. Use Lite Ice Cream for this recipe.
After spinning these are best eaten straight away. If you have leftovers, smooth the top, freeze with the lid on, and re-spin within 5 to 7 days for the best texture.
If you meal prep multiple tubs you can keep them in the freezer for about 3 months before spinning, but I don't know anyone who can let them last this long!
The most common reasons are not enough freeze time, too low in fat, or not blending the base well enough. Add a splash of milk and try one more respin before giving up.
More Ninja Creami Recipes You'll Love
If you enjoyed this recipe, here are a few more Ninja Creami favorites from my kitchen:
Start by reading my 12 Ninja Creami Tips for Perfect Results Every Time. This will allow you to perfect any ninja creami recipe with confidence.
After that try these ninja creami recipes:
Nutrition Information
Below is the recipe I typically follow and an estimate for the nutrition breakdown. Always remember though, food is much more than just a number!
My go-to base:
240 millilitres low fat 2% milk
20 grams casein protein powder
50 grams or ½ a banana

📖 Recipe

Ninja Creami Protein Ice Cream Recipe
Equipment
Ingredients
Base liquid: Pick one
- 240 milliliters Dairy milk 1 cup,(whole, low-fat, or skim)
- 240 milliliters Fairlife or other high-protein milk 1 cup,
- 240 milliliters Unsweetened Plant based milk 1 cup, cashew, soy or barista style oat work best
For creaminess add one or two of the following:
- ½ a ripe banana about 50 grams
- ¼ ripe avocado
- 5-10 grams sugar-free pudding mix about 1-2 teaspoons
- ⅛ teaspoon xanthan or guar gum helps with that soft-serve texture
- 1 tablespoon cream cheese
For extra protein add one or more of the following:
- 20 grams protein powder about 1.5-2 tablespoonscasein or a whey-casein blend works best, plant-based can work too
- 60 grams low-fat cottage blend well so it’s smooth, ¼ cup
- 60 grams Greek yogurt ¼ cup
Optional pre-freeze flavor boosters:
- A few drops of vanilla extract or other flavouring
- 1 teaspoon Sweetener to taste e.g., stevia, honey, maple syrup
- A dash of cinnamon or cocoa powder
- Berries or frozen fruit
- pinch of salt to enhance flavor
- 1 tablespoon cocoa powder
My Go-To Toppings (included in nutrition calculation)
- ½ chopped protein bar I like fulfil and barebell
- 2 teaspoons peanut butter or almond butter
Other Optional Toppings
- 1 tablespoon Chocolate chips
- 1-2 tablespoon cereal, pretzels etc.
- berries or chopped fruit
Instructions
- Blend your base. Using a blender or milk frother, combine your milk of choice, protein powder, and creaminess booster. If you are using Greek yogurt or cottage cheese, use a blender to avoid lumps. Add your flavour extras at this stage too.
- Freeze for 24 hours.If you are short on time, 12 hours can work but the texture will not be as good. Freeze with the lid off to avoid the dome that can damage your machine.
- Soften slightly before spinning: Let it sit at room temperature for 5 to 10 minutes, or run the container under warm water for 30 to 60 seconds until the sides start to loosen. You can also pop it in the microwave for 10 to 20 seconds.
- Spin it. Place the container into your Ninja Creami and run the Lite Ice Cream cycle. Check the texture. If it looks powdery or crumbly, run a butter knife around the edges, add a splash of milk, and re-spin.
- Add mix-ins. Make a small hole in the centre, add your chopped protein bar and peanut butter (or whatever mix-ins you are using), and run the Mix-In cycle. Or simply mix them in by hand.
- Serve and enjoy! I recommend eating it straight away. You can freeze leftovers and re-spin later, but the consistency is never quite the same as the first creation.
Save This Recipe! 💌
Notes
- 240 ml low-fat (2%) dairy milk
- 50g banana
- 20g casein protein powder
- 10g peanut butter
- ½ Barebells protein bar (chopped)

Sean Hussey says
Love this recipe. I add chocolate chips and peanut butter to mine.
Maria Lucey RD says
Delighted to hear this!