


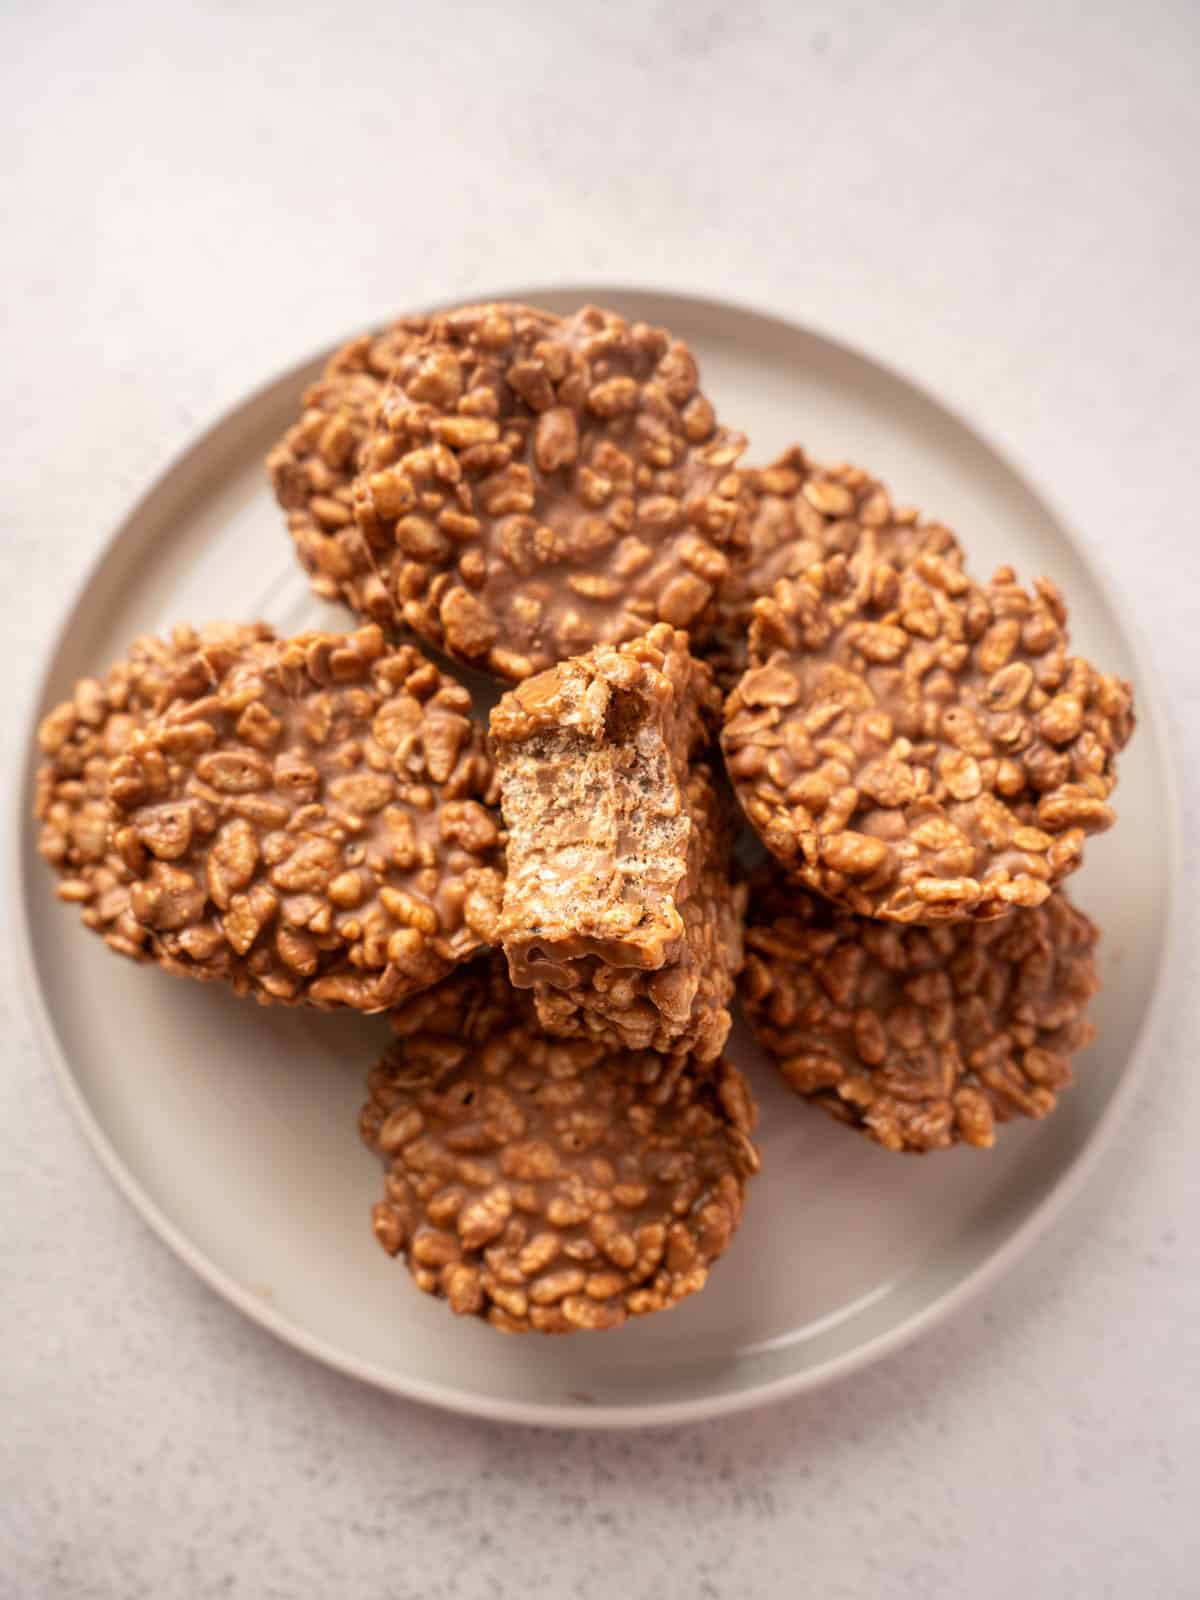
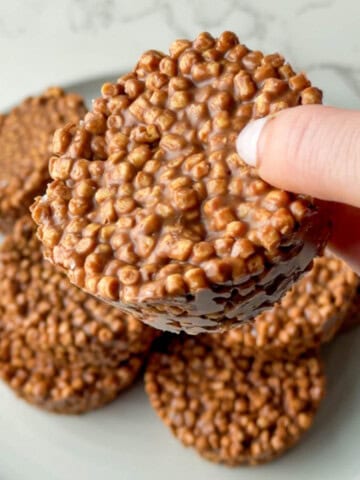
These healthy rice krispie treats are made with chocolate, peanut butter, oats, seeds and Rice Krispies to make them a little more satisfying than the classic version. They take just 10 minutes to prep and then straight into the freezer to set.
A Quick Look At This Recipe
✅ Recipe Name: Healthy Rice Krispie Treats
🕒 Ready In: ~10 minutes prep + ~1 hour to set
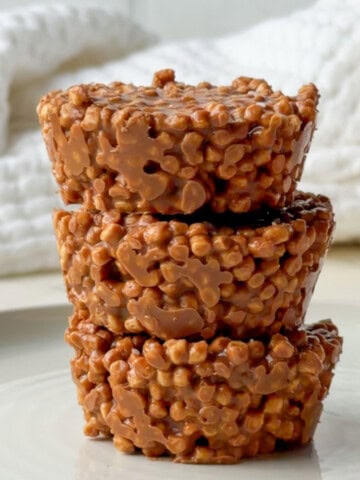
👪 Makes: 12 cups
🍽 Nutrition: 254 calories, 7 grams of protein and 2 grams of fiber per cup
🥣 Main Ingredients: Chocolate, peanut butter, oats, rice krispies, hemp seeds or ground flaxseed/linseed
🛠️Equipment: 12-hole muffin tray (ideally silicone) or add paper cases
📖 Dietary Info: No-bake, vegetarian, can be made dairy-free
Growing up in Ireland, Rice Krispie treats were simply just Rice Krispies and melted chocolate, nothing else. That was the version I knew, and LOVED. When I started working abroad and chatting with people about food, I quickly realized that this isn't universal. It turns out a lot of people made them with marshmallows, particularly in the States!
Now as much as I LOVE the original, the dietitian in me can’t help but make a slightly more balanced version. That’s where the oats and peanut butter come in. It’s a small tweak, but it makes these krispie treats a lot more satisfying and helps slow things down a bit compared to the original, which is mostly carbohydrates on its own.
If you love no-bake chocolate treats with my "healthified" touch I'd recommend my Healthy Rocky Road recipe next. Or if you want to stay with the crispy cup style my soy protein crisp bars are incredible and one of the most popular recipes on my site!
Jump to:
Nutrition Highlights
- The peanut butter contributes most of the protein and healthy unsaturated fats, while the oats add a little more texture and slow-releasing carbohydrates compared to Rice Krispies alone.
- The hemp seeds or ground flaxseed bump up the protein and omega-3 fatty acid content a little further .
- They are kid-friendly and great for sharing. Just be mindful of nut allergies in school settings.
- They freeze really well, so you can make a batch and keep them on hand for whenever you need them.
Nutrition information was calculated using Cronometer. Your numbers may vary slightly depending on the exact brands and measurements you use.
Key Ingredients
- Chocolate: You can use milk chocolate or dark chocolate here and both work well. Milk chocolate is the classic choice and dark chocolate (70% or above) gives a slightly richer, less sweet result. White chocolate is also an option but requires extra care when melting as it can seize quickly. Go with whatever you genuinely enjoy eating.
- Peanut butter: Smooth peanut butter works best here for easy mixing and a consistent texture throughout. If your peanut butter is on the thicker side, give it a 20 to 30 second blast in the microwave before adding it. This makes it much easier to work with. I always recommend choosing a peanut butter made with just peanuts, or peanuts and salt listed in the ingredients.
- Rice Krispies (crispy rice cereal): Any crispy rice cereal works here. If you'd like a slightly more nutritious base, look for a brown crispy rice cereal option. These are widely available in health food shops and larger supermarkets.
- Oats: Rolled oats or quick oats both work. They add a little extra texture and slow-releasing carbohydrates without changing the overall flavour of the treats.
- Hemp seeds or ground flaxseeds: These are a great optional add-in if you have them. They're a source of plant-based protein, fiber and omega-3 fatty acids, and they blend right into the mixture without affecting the flavor or texture.
Ingredient Substitutions
Here are some tips to help you adjust the recipe to suit your individual dietary needs and preferences. I only recommend swapping 1 - 2 ingredients, so the original recipe doesn't completely change.
- Vegan: Use dairy-free chocolate. All other ingredients are already plant-based.
- Nut-free: Swap the peanut butter for sunflower seed butter or pumpkin seed butter. These work in the same way and give a similar result without the nuts.
- Gluten-free: Use certified gluten-free oats and a gluten-free crispy rice cereal. Standard Rice Krispies are not gluten free as they may contain barley malt.
- Lower sugar: Use dark chocolate (85%+) instead of milk chocolate. This reduces the overall sugar content while keeping the recipe just as satisfying.
- Higher in protein: I recommend checking out my protein rice krispie squares or soy protein crisp bars if you want a higher protein version of these healthy rice krispie treats. The protein rice krispie squares recipe uses protein powder and the soy protein crisp bars recipe uses soy protein crispies, an ingredient I have come to love.
Please note: This recipe has not been tested with other substitutions or variations. If you replace or add any ingredients, please let me know in the comments below! I'd love to hear how it worked out! 💛
Recipe Variations
Almond butter version: Swap the peanut butter for smooth almond butter.
Dark chocolate and sea salt: Use 70% or 85% dark chocolate and finish each cup with a small pinch of flaky sea salt before setting. The salt really brings out the chocolate flavour.
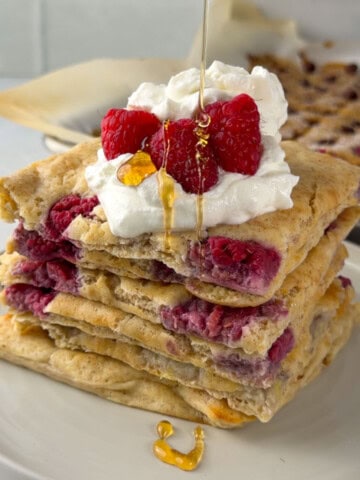
White chocolate and raspberry: Use white chocolate instead of milk chocolate and stir through a small handful of freeze-dried raspberries with the Rice Krispies. Be careful melting white chocolate. Do it slowly in short microwave bursts and stir frequently.
Save This Recipe! 💌
Equipment
Silicone muffin tray: This is the one piece of equipment I'd really recommend for this recipe. A 12-hole silicone muffin tray means the cups pop out cleanly with no paper liners needed and no sticking. If you only have a standard metal muffin tray, line each hole with a paper cupcake case before adding the mixture.
How To Make These Healthy Rice Krispie Treats
Below are the simple steps for how to make this recipe with visuals I hope are helpful! Don't forget to check out the recipe card at the bottom for the full recipe.

Melt the chocolate and coconut oil together. Add them to a microwave-safe bowl and heat in 30-second intervals, stirring well between each burst, until completely smooth. Alternatively, melt gently over a bowl of simmering water (bain-marie method). Stir in the peanut butter until the mixture is smooth and fully combined. If the peanut butter is thick, microwave for an additional 20 to 30 seconds to loosen it.

Add the Rice Krispies, oats, a pinch of salt (if using), and the hemp seeds or ground flax/linseeds (if using). Stir until everything is evenly coated in the chocolate mixture.

Spoon the mixture into the muffin tray and press down firmly with the back of a spoon. Transfer to the freezer for at least one hour. Once set, pop the cups out of the tray and allow them to sit at room temperature for 5 to 10 minutes before eating for the best texture.
Expert Tips for Making This Recipe
Don't rush the melting. Whether you're using the microwave or a bain-marie, go low and slow. Overheating chocolate can cause it to seize (go grainy and thick) and there's no coming back from that. Short 30-second bursts in the microwave with stirring in between is the safest approach.
Warm your peanut butter if it's thick. Cold or very thick peanut butter won't combine smoothly with the chocolate. A quick 20 to 30 second microwave should be enough to loosen it up.
Press the mixture down firmly. When filling the muffin cups, press the mixture in firmly so the treats hold their shape once set. Loosely filled cups can crumble when you try to eat them.
Let them temper slightly before eating. Straight from the freezer they'll be very firm. Leaving them on the counter for 5 to 10 minutes gives you that perfect firm-but-not-rock-hard texture.
Use a silicone tray if you can. If you make these regularly, a silicone muffin tray is worth it. The cups just pop straight out with no lining, no peeling, and no mess.
Storage
Fridge: Store in an airtight container in the fridge for up to 4 days.
Freezer: Freeze for up to 2 months (but I guarantee they won't last that long). Store in an airtight container or freezer bag. When you're ready to eat one, let it sit at room temperature for 5 to 10 minutes before eating.
FAQ
No. You can also press the mixture into a lined 8x8 inch (20x20 cm) baking tray and cut into squares once set. The cups are convenient for portion control and storage, but the bar format works just as well. Chill or freeze until firm before cutting.
This usually happens if the mixture wasn't pressed firmly enough into the cups, or the treats were handled before they were fully set. Make sure to press the mixture in firmly and leave them in the freezer for at least a full hour before removing.
More Healthy Snack Recipes You'll Love
Want to Learn About Nutrition?
Here are some nutrition education articles from a dietitian! And if you have any questions, feel free to reach out - I'm here to help.


📖 Recipe

No-Bake Healthy Rice Krispie Treats with Chocolate and Peanut Butter
Equipment
Ingredients
- 180 grams chocolate milk or dark 1cup
- 200 grams smooth peanut butter ¾ cup
- 100 grams Rice Krispies / crispy rice cereal 3 cups
- 50 grams oats rolled or quick ½ cup
- 20 to 30 grams hemp seeds or ground flaxseeds/linseed about 2-3 tablespoons for extra protein and healthy fats.
- Pinch of sea salt optional (skip if your peanut butter is already salted)
Instructions
- Prepare your muffin tray. If using a silicone tray, no lining is needed as the cups will pop straight out. If using a metal tray, line each hole with a paper cupcake case.
- Melt the chocolate in a microwave-safe bowl, heating in 30-second intervals, stirring well between each burst, until completely smooth. Alternatively, melt gently over a bowl of simmering water (bain-marie method).180 grams chocolate
- Stir in the peanut butter until the mixture is smooth and fully combined. If the peanut butter is thick, microwave for an additional 20 to 30 seconds to loosen it.200 grams smooth peanut butter
- Add the rice krispies, oats, sea salt (if using), and hemp seeds. Stir until everything is evenly coated.100 grams Rice Krispies / crispy rice cereal, 50 grams oats, Pinch of sea salt, 20 to 30 grams hemp seeds or ground flaxseeds/linseed
- Spoon the mixture into the muffin tray and press down firmly with the back of a spoon.
- Transfer to the freezer for at least 1 hour, or until fully set. Remove from the tray and allow to sit at room temperature for 5 to 10 minutes before eating for the best texture.
Save This Recipe! 💌
Video
Notes
- Toast your oats at 350°F (175°C) for 5–10 minutes for extra flavor.
- If needed, add 1–2 teaspoons of coconut oil to help the chocolate melt more smoothly. This is more useful if using dark chocolate, as milk chocolate melts more easily.
I used Rice Krispies in this recipe. If using a different brand of crispy rice cereal, measure using cups, as cereals can vary quite a bit in weight. Chocolate choice: Milk chocolate gives a classic sweet result. Dark chocolate (70%+) is slightly less sweet and a little richer. White chocolate works but melts differently, so use short microwave bursts and stir frequently. No muffin tray? Press the mixture into a parchment-lined baking dish or lunch box and cut into bars once set. Storage: Store in an airtight container in the fridge for up to 4 days. Store for up to 2 months in the freezer. Let sit at room temperature for 5 to 10 minutes before eating. Tips for success:
- Press the mixture firmly into each cup so the treats hold their shape.
- Don't rush the melting. Low and slow prevents the chocolate from seizing.
- These are best eaten after a few minutes at room temperature rather than straight from the freezer.
Ana Margarida says
My family loves this.
So delicious and so easy to make.
In my previous comment I accidentally selected 3 stars I’m so sorry.
Maria Lucey RD says
Hi Ana, that is no problem at all 💚 Thank you so much for taking the time to leave a review, it really helps food bloggers so I really appreciate it! I'm delighted to hear your family loves the recipe too ✨