

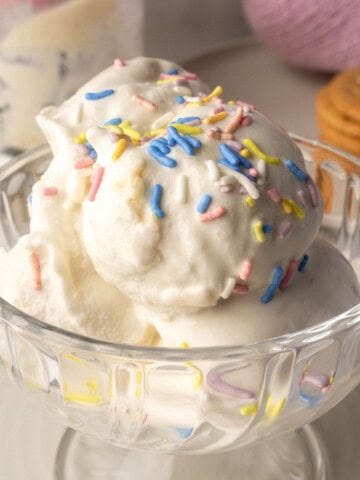
These are my top 12 Ninja Creami tips — the ones I really wish I had when I first started. If you want super smooth, creamy results every time, this list is for you.

I love my Ninja Creami now, but when I first got it? Total disaster. My first attempt was icy, powdery and dry.
But after using it for over a year now (yes, I'm committed), I've picked up a bunch of Ninja Creami tips and tricks to take your Ninja Creami ice creams from "meh" to amazing without compromising on health.
And if you’re in need of a foolproof high-protein recipe to get started, I’ve shared my go-to Ninja Creami protein ice cream formula here.
Jump to:
Ninja Creami vs Deluxe
I have the original Ninja Creami. The Ninja Creami Deluxe is a more expensive, larger version with a few more settings. I have managed perfectly fine with the original and have no intention to upgrade anytime soon. You can 100% make incredible healthy high protein ice cream in the original.
Essential Ninja Creami Tips and Tricks
1. Use a Mix of Milks for a Creamier Result
Plant-based milks like almond and oat are popular lower-calorie options, but on their own, they often make icy Ninja Creami desserts. If you're after that ultra-creamy texture, try using a combo of dairy and plant-based milk—or go fully dairy-based if you can.
Plant-based milks alone just don't bring the same creaminess. But of course, if you're dairy-free or vegan, you can still make it work with the right recipe.
I love adding Greek yogurt to my base—about ½ cup per pint—for extra protein and creaminess. It's my secret weapon for that luxurious mouthfeel without loading up on heavy cream.
2. Protein Powder Matters (Like, A Lot)
Not all protein powders work the same in the Ninja Creami—not even close! After trying literally dozens (the things I do for science...), I've found that:
- Whey/casein blends usually create the best texture
- Pure whey can get a bit icy unless you add extra fat
- Plant proteins need more help—add extra fat and xanthan gum
- Protein powders with built-in thickeners (like guar gum on the ingredient list) perform better
3. Use Xanthan Gum for Next-Level Creaminess
This one changed the game for me. Just a teeny bit (like ⅛ of a teaspoon or 1-2 grams) of xanthan gum helps thicken things up and stops the ice cream from going icy. I use the Bob's Red Mill brand, but any xanthan gum will do. If you can't get your hands on it, a bit of sugar-free pudding mix (5-10g) works pretty well too.
But warning: more isn't better here. A little goes a long way or your ice cream might turn out too thick and gummy. I measure mine on a small digital scale for accuracy.
4. Eat It All (Or Most of It) in One Go
This trick not seem very "dietitian" of me, but hear me out: Ninja Creami ice cream tastes best freshly spun. If you freeze it again and try to respin it the next day, the texture is never quite the same.
If you have leftovers, let it thaw on the counter a bit instead of re-spinning it from rock-hard again.
If you absolutely must save some, press plastic wrap directly onto the surface (this prevents those ice crystals) and let it sit out for about 10-15 minutes before digging in the next day.
5. Avoid Icy Edges
When you remove the Ninja Creami tub from the freezer, run the container under hot water for 30 seconds before putting it through the machine (or let it sit out on the counter for 15-20 minutes). After the initial spin, run a butter knife or spoon along the sides and re-spin.
This will ensure your frozen dessert is thoroughly mixed with no icy outer edges. It's a simple extra step that makes a huge difference in the final texture!
This becomes even more important if:
- You're making anything high-protein
- You didn't add any emulsifiers
- You notice the texture is uneven after the first spin
Save This Recipe! 💌
6. Master the Re-Spin Button
The re-spin button is your best friend for fixing texture issues:
- If your ice cream seems too dry or crumbly, hit that re-spin button using the same setting. It often helps to add 1-2 tablespoon of milk to the mixture before you re-spin
- You can re-spin up to 3 times, but after that, you risk over processing
- If it's still not right after 2 re-spins, let it thaw for 5 minutes, then try once more
If you like your ice cream more like soft serve, you re-spin 2-3 times before adding in your mix ins. This will soften the ice cream. If you like your ice cream more scoop-able, I recommend sticking with 1 re-spin.
7. Prep in advance
I have found that I don’t necessarily need to wait 24 hours, but it helps give you that perfect texture. Anything under 20 hours and you risk it turning out chalky. Initially I thought the 24 hour freezing requirement was mainly for technical reasons to avoid damaging the machine but it has benefits for the final texture more than anything else!
Pro tip: Get a few pint containers on amazon and keep them in rotation. I make 2-3 bases at once, freeze them all, and then I've always got something ready to go when cravings strike. Just make sure you buy pint containers for whichever creami model you have as the original and deluxe use different size containers.
Also, make sure your freezer is actually cold enough. Sounds obvious, but it makes a difference! Set it to the coldest setting if you can (ideally -18°C/0°F or colder).
8. Make It Sweeter Than You Think
Freezing dulls sweetness, so always sweeten your mix a little more than you'd expect. If you're using flavored protein powder or pudding mix, you may be ok but test and adjust your next batch as needed.
9. Don’t overfill the container.
The ice cream will expand in volume as your re-spin so don’t worry if it looks like the pint isn’t initially full. Leaving adequate room in the container will allow the ice cream to spin correct to make the best, most creamy ice cream.
10. Be Gentle With the Machine
This machine is amazing but also a little... particular. Don't force anything if it seems stuck, and always make sure the lid is fully locked in before spinning. You don't want to break your beloved Creami (or have to clean up a mid-spin disaster).
Also, hand wash that blade assembly right away—don't let it sit with dried-on ice cream residue. Trust me, cleaning crusty protein ice cream off those blades the next day is no fun at all.
11. Sneak in Some Nutrition Boosters
The beauty of making your own ice cream is adding in good stuff that store brands don't have:
- Frozen cauliflower rice (I PROMISE you can't taste ¼ cup in a chocolate base)
- Ground flaxseed for fiber and omega-3s
- Frozen banana chunks for natural sweetness
- Chia seeds
- A spoonful of cocoa powder for antioxidants (and chocolate goodness!)
Start with small amounts of these "boosters" and then increase as you get braver.
Just make sure you fully blend these add in before setting them to freeze.
12. Test, Tweak, and Have Fun With It
Every base is different, and part of the fun is experimenting. Don't stress if your first few tries aren't perfect. Try new protein powders, flavors, and mix-ins. Write down what works (and what definitely doesn't). You'll be making pint perfection in no time.
I keep a little note in my phone with my successful recipes so I can replicate them exactly.
Trouble shooting
When things go wrong (and they will sometimes), here's how to fix them:
Icy or Grainy Texture?
- Add 1-2g xanthan gum to your next batch
- Increase fat content (add 1-2 tablespoons of cream, cream cheese or nut butter)
- Make sure you're freezing long enough (minimum 24 hours)
- Try the re-spin function with the same setting, or bump up to a higher-intensity setting
- Make sure to fully blend the mixture before freezing
Too Soft/Not Freezing Properly?
- Check your freezer temperature (should be below -18°C/0°F)
- Reduce liquid content in your base
- Don't overfill the container (leave ½ inch at the top)
- Add those thickening agents I mentioned earlier
Machine Struggling/Making Weird Noises?
- Your base might be too hard—let it thaw for 5 minutes
- Recipe might be too thick—ease up on the thickeners next time
- Check for even freezing—don't let it partially thaw and refreeze
Why I Love the Ninja Creami as a Dietitian
- It lets me make portion-controlled desserts that actually satisfy my sweet tooth (and my clients') without going overboard
- I can control exactly what goes in—perfect for people with allergies or specific nutrition goals
- Making high-protein frozen treats is SO much easier (and cheaper than buying them!)
- I can create lower-sugar versions that actually taste good (not that weird aftertaste some store brands have)
- It's fun to sneak in nutrient-dense ingredients like fruits, nuts, and yes, even veggies sometimes
- It helps me (and my clients) enjoy treats mindfully while still keeping nutrition on track
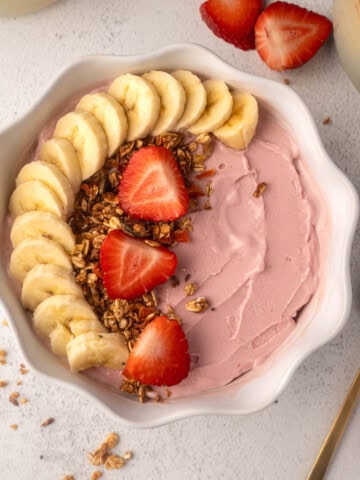
Ninja Creami Recipes You'll Love
By now, I’m hoping these tips have helped you feel confident using your Ninja Creami. To get started, check out some of my favorite Ninja Creami recipes below.
FAQs
Usually it's one of three things: not enough stabilizers, not freezing long enough, or too much liquid in your base. Try adding 1-2g xanthan gum, freezing for at least 24 hours, and making sure you have enough fat in your base.
Absolutely! Protein powder works great, but you'll need to adjust the liquid ratio and possibly add more fat. Casein or blended proteins usually give better results than just whey.
Hand wash that blade assembly right away with warm soapy water—don't put it in the dishwasher! The pint containers and lids are dishwasher safe, but they last longer if you hand wash them too.
This usually means your base is too hard or unevenly frozen. Try letting the pint thaw for 5 minutes before processing or giving it that hot water bath I mentioned in tip #5.

Kayla says
This is SO helpful!! I just got my first Creami and can’t wait to try it out with these tips in mind! Thank you 🙏
Maria Lucey RD says
Yeah!!! Thank you for reading Kayla - I'm so obsessed with my ninja creami and I am sooo excited for you to fall in love with it too 💖