


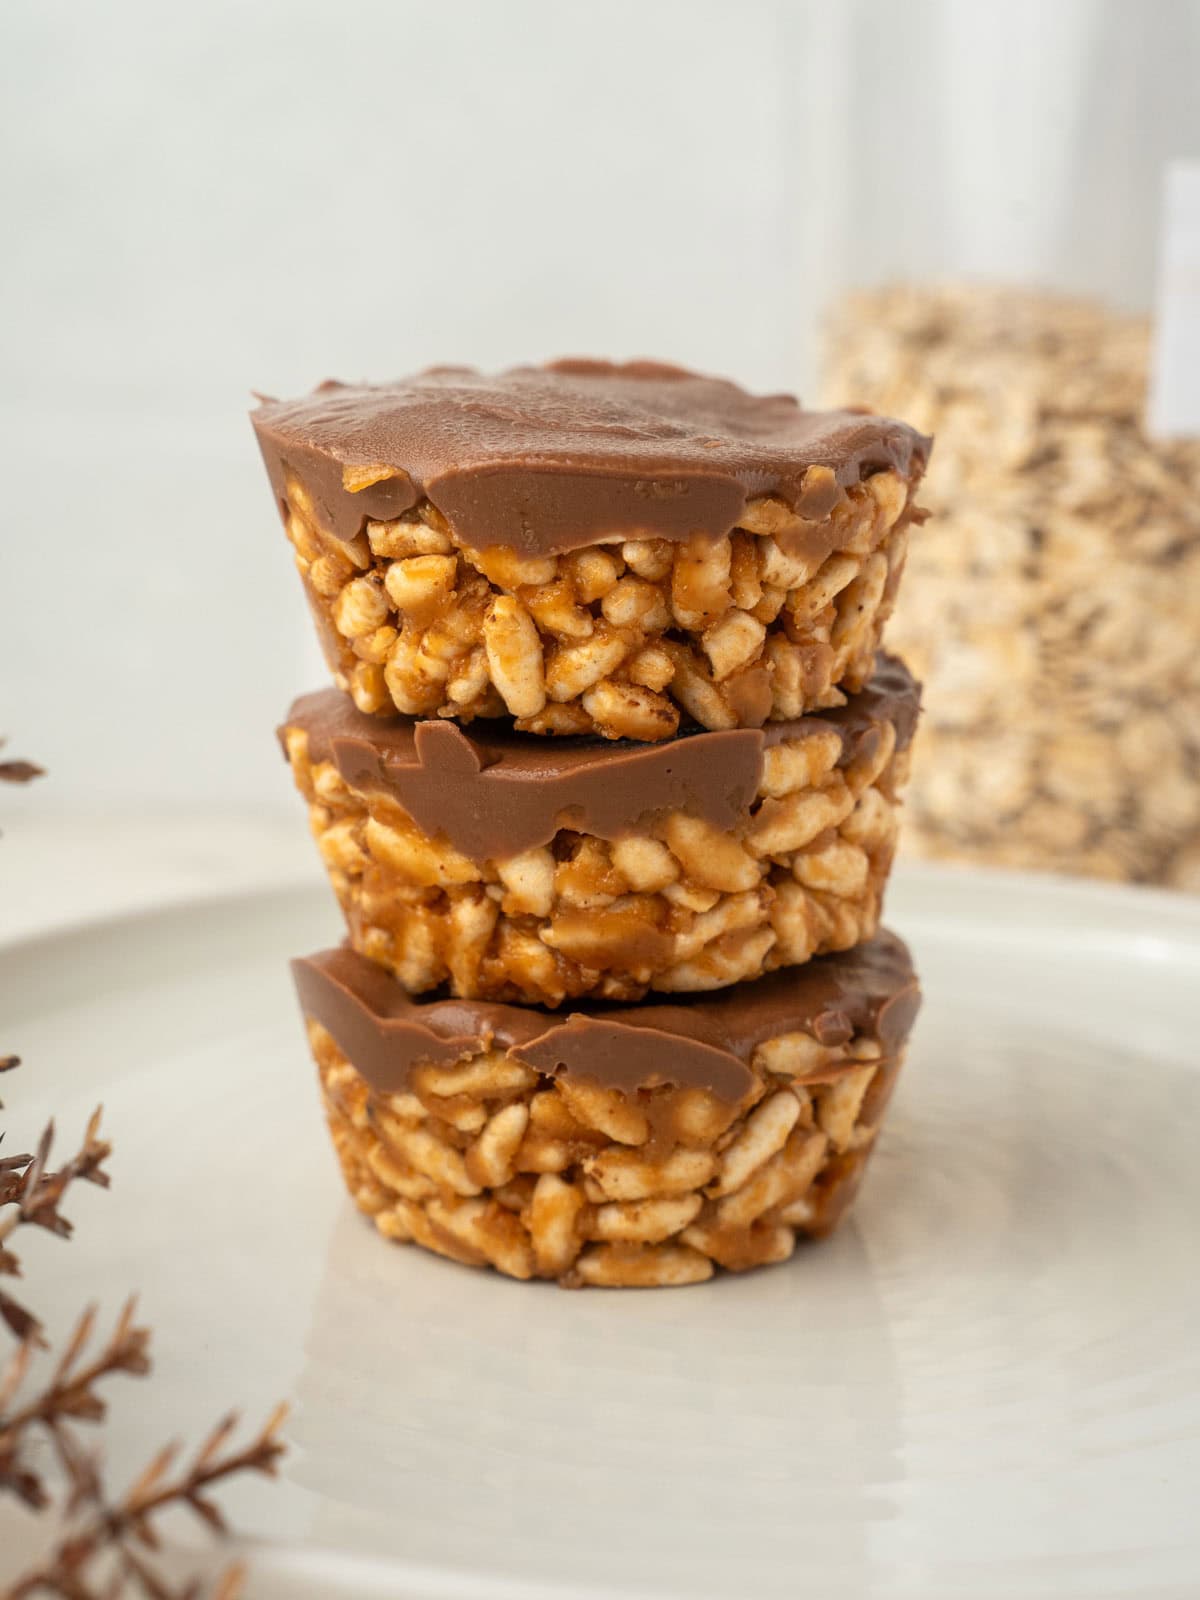
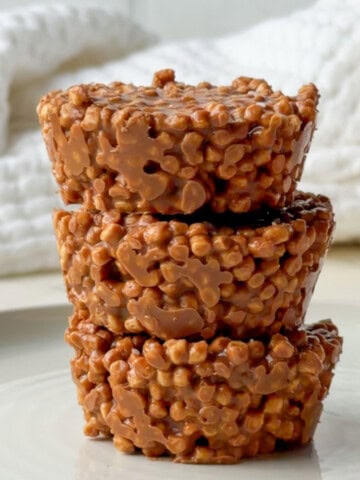
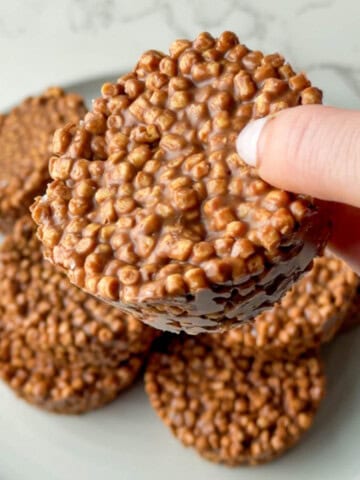
These chocolate peanut butter crispy cups are a no bake treat that comes together in about 15 minutes. A crunchy rice cereal base coated in a sweet peanut butter caramel, then topped with smooth melted chocolate. No oven, no fuss, just a really good combination of flavours and textures.
A Quick Look At This Recipe
✅ Recipe Name: No Bake Peanut Butter Crispy Cups
🕒 Ready In: ~15 minutes active prep + 1-2 hours chilling
👪 Serves: 12 cups
🍽 Course: Dessert / Treat
🥣 Main Ingredients: Brown rice cereal, peanut butter, maple syrup, brown sugar, coconut oil, chocolate
⭐ Why You'll Love It: No oven needed & peanut butter with chocolate is always a good idea.
When I was in secondary school (known as high school in the states) I had the task of baking for a children's birthday party as one of my leaving certificate or final year home-economics projects. I made rice krispie treats for a full year in preparation for this, so I now consider myself a bit of a crispy queen - hence why there are so many rice krispie recipes on my blog!
They will always be one of my favorite treats and something I try to make for everyone I love! This version is a fun mix between a Reeses peanut butter cup and a traditional crispy cup!
If you love this recipe, I'm sure you'll enjoy my healthier rice krispie treats and soy protein crisp bars just as much!
Jump to:
Key Ingredients
Brown rice cereal: Measure this by cup, not by weight. Different brands have different densities, so 3 cups of rice krispies will weigh differently to 3 cups of an organic crisp rice cereal. Going by cup keeps things consistent across brands.
Peanut butter: It has to be runny. If your peanut butter has been sitting in the fridge and is thick and stiff, warm it briefly or let it come to room temperature first. Stiff peanut butter won't coat the cereal properly and the base won't hold together well. I always recommend choosing a peanut butter that is 100% nuts or simply peanuts and a small bit of salt.
Maple syrup: This is what gives the base that caramel-like quality.
Brown sugar: Just a small amount, enhances that caramel base.
Coconut oil: This helps the base set firmly and helps everything combine together.
Chocolate chips: Dark chocolate (70% and above) works really well here. It balances the sweetness of the base. That said, use whatever chocolate you enjoy. Milk chocolate gives a creamier result.
Ingredient Substitutions
Here are some tips to help you adjust the recipe to suit your individual dietary needs and preferences. I only recommend swapping 1 - 2 ingredients, so the original recipe doesn't completely change.
Vegan: Use dairy-free chocolate.
Gluten-free: Use a certified gluten-free rice cereal. Standard rice krispies are not gluten-free, so this swap matters if you have coeliac disease or a gluten intolerance.
Nut-free: Swap the peanut butter for sunflower seed butter or pumpkin seed butter. The flavour will be slightly different but the texture should hold up well.
Please note: This recipe has not been tested with other substitutions or variations. If you replace or add any ingredients, please let me know in the comments below! I'd love to hear how it worked out! 💛
Save This Recipe! 💌
Equipment
12-cup muffin tin: Silicone muffin tins are the easiest option because the cups just pop straight out once set. If using a metal tin, make sure to use paper liners or silicone liners to avoid sticking.
Expert Tips for Making This Recipe
- Press the base down firmly. This is the most important tip. If you don't compact the mixture well, the cups will crumble when you try to lift them out. Use the back of a spoon and really push down.
- Make sure your peanut butter is runny before you start. If it's stiff, the caramel won't combine with it smoothly and the base won't coat the cereal properly.
- Don't overheat the chocolate. Melt it gently in short intervals, stirring between each. Overheated chocolate can seize up and go grainy.
- Let the chocolate set fully before removing the cups from the tin. If you rush this step, the tops can crack or smear.
- Measure the rice cereal by cup, not by weight. Different brands will give you different weights for the same volume, so cups is the more reliable measure here.
Storage
Fridge: Store in an airtight container in the fridge for up to 5 days. They're best eaten straight from the fridge or after a few minutes at room temperature.
Freezer: They'll keep for up to 3 months in a freezer bag. Let them sit at room temperature for 5 to 10 minutes before eating.
I don't recommend keeping them at room temperature, unless your house is very cold!

Recipe FAQS
Yes. However make sure it's still runny enough to combine well with the caramel mixture. Stiff nut butter of any kind will cause issues. A crunchy peanut butter will give more texture but a smooth peanut butter may be easier to work with in this recipe.
The most likely reason is that the peanut butter was too thick, or the base wasn't pressed down firmly enough in the tin. Make sure your peanut butter is at room temperature and runny before you start, and really compact the mixture into each cup before chilling.
Yes. Puffed brown rice or any crisp rice cereal will work. Just make sure to measure by volume as I have weighed a few different crisp rice cereal brands and they all vary slightly. If using a completely different type of cereal just make sure its possible to compact it tightly into the cups.
Yes. The base is good enough to eat on its own.
More No Bake Recipes You'll Love
If you enjoyed these peanut butter crispy cups, here are some other no bake recipes worth trying.
📖 Recipe

No Bake Chocolate Peanut Butter Crispy Cups
Equipment
- 12-cup muffin tray Silicone muffin tins are the easiest option because the cups just pop straight out once set. If using a metal tin, make sure to use paper liners to avoid sticking.
Ingredients
For the base:
- 192 grams smooth peanut butter runny (¾ cup)
- 4 tablespoons maple syrup
- 1 tablespoon light brown sugar or coconut sugar
- 1 tablespoon coconut oil or butter
- 1 teaspoon vanilla extract
- ¼ teaspoon salt omit if peanut butter is already salted
- 3 cups brown rice cereal measure by cup — see notes. I like the brand Natures Path.
For the chocolate topping:
- 180 grams chocolate or chocolate chips 1 cup, I recommend dark or semi-sweet
- 2 tablespoons smooth peanut butter
- 1 teaspoon coconut oil or butter
Instructions
- In a medium saucepan over low heat, combine the peanut butter, maple syrup, brown sugar, coconut oil and vanilla. Stir constantly until the sugar has dissolved and everything is completely smooth and well combined.192 grams smooth peanut butter, 4 tablespoons maple syrup, 1 tablespoon light brown sugar, 1 tablespoon coconut oil, 1 teaspoon vanilla extract, ¼ teaspoon salt
- Add the rice cereal and fold gently until every piece is fully coated in the peanut butter mixture.3 cups brown rice cereal
- Divide the mixture evenly between the 12 muffin cups. Press down very firmly with the back of a spoon or your fingertips to compact each cup. This step is key for cups that hold their shape.
- Place the tray in the fridge while you make the chocolate topping.
- In a microwave-safe bowl, combine the chocolate chips, peanut butter, and coconut oil. Microwave in 30-second intervals, stirring well between each, until fully melted and smooth.180 grams chocolate or chocolate chips, 2 tablespoons smooth peanut butter, 1 teaspoon coconut oil
- Spoon the chocolate topping evenly over each cup, spreading to cover the surface.
- Refrigerate for at least 2 hours or freeze for 1 hour, until the chocolate is fully set. Remove from liners and enjoy.
Save This Recipe! 💌
Notes
- Press the base down very firmly before chilling.
- Do not overheat the chocolate when melting.
- Let the chocolate set fully before removing from the tin.
Comments
No Comments