


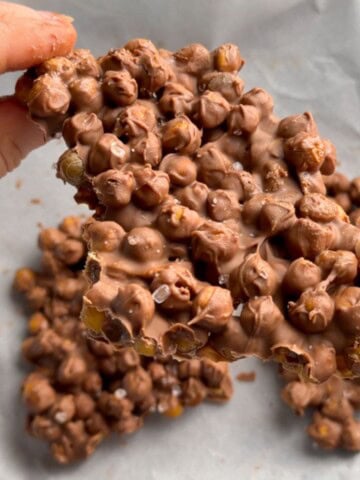
These easy Protein Rice Krispie Squares are the perfect no-bake treat when you're craving something sweet but want a little extra staying power from protein. Made with crisp rice cereal, chocolate protein powder, peanut butter, and honey, they deliver 7g of protein per square.

As a child, I LOVED chocolate rice krispie cakes, and honestly, I still do! There's something so nostalgic about that crispy, chocolatey combination.
But I wanted a version I could make at home that I’d feel good eating more often. Something sweet, but without the sugar crash. And because I’m always thinking about staying fuller for longer, I wanted it to actually help with my protein goals too.
So I started experimenting... and that’s how these Protein Rice Krispie Squares were born!
If you love rise crispy inspired treats you will love my soy protein crisp bar recipe too. This recipes requires no protein powder, instead using a very special ingredient to pack 8g of protein per serve.
A Quick Look At This Recipe
✅ Recipe Name: Easy Protein Rice Krispie Squares Recipe (No Bake)
🕒 Ready In: ~15 minutes active prep + 2 hour chilling
👪 Serves: 20 squares
🍽 Nutrition: ~130 calories and 7g of protein per square
🥣 Main Ingredients: Crisp rice cereal (like rice krispies), chocolate protein powder, peanut butter and honey
⭐ Why You'll Love It: No baking required, perfect for meal prep
Jump to:
Nutrition Highlights
- The crisp rice cereal provides easily digestible carbohydrates, making these squares a great option for a pre-workout snack when you need quick energy.
- The peanut butter adds healthy monounsaturated fats along with additional protein, while honey acts as a natural sweetener and helps bind everything together.
- By using chocolate protein powder, you get the chocolate flavor you crave without needing loads of chocolate chips or cocoa powder. This keeps the overall sugar content more moderate while still delivering on taste.
- The optional dark chocolate topping adds antioxidants and a touch of indulgence without going overboard on added sugars.
Remember, these are still a treat rather than an everyday breakfast, but they're a much smarter choice than many store-bought protein bars that can be loaded with artificial ingredients and excessive sugars.
Key Ingredients
Below are some ingredient notes. For the exact ingredient measurements and the full recipe, be sure to check the printable recipe card at the bottom.

- Peanut Butter: Look for a natural peanut butter made with just 1-2 ingredients (peanuts and salt). I recommend ensuring your peanut butter is as runny as possible. If you're using peanut butter from the end of the jar when it's more crumbly, you may need to gently warm it or add a touch more moisture to help everything bind properly.
- Honey: This acts as a natural sweetener and binder. You can swap it for maple syrup if you prefer, but honey keeps things nicely chewy and adds a lovely flavor. If using maple syrup, I'd recommend using slightly less as it tends to be more runny than honey.
- Crisp rice cereal: This is what gives the bars their light, crunchy texture. Make sure not to use a puffed rice cereal as it will go soggy. You want crispy rice cereal (like Rice Krispies) for the best texture.
- Protein powder: Use a chocolate flavored protein powder to get that nostalgic chocolate rice krispie taste! I used Ascent Whey chocolate protein powder, but any chocolate protein powder you enjoy will work.
Optional chocolate topping:
- Chocolate chips: I choose dark chocolate for the antioxidants and less sugar, but use whichever you prefer.
- Coconut oil: This helps the chocolate melt smoothly and gives the bars a shiny finish.
Other topping suggestions:
- Try drizzling melted chocolate over the bars instead of doing a full chocolate layer for a lighter option Omit the chocolate completely and sprinkle desiccated coconut, chopped nuts, or seeds on top instead Add a sprinkle of flaky sea salt over the chocolate for a sweet and salty combination
Substitutions
Here are some tips to help you adjust the recipe to suit your individual dietary needs and preferences. I only recommend swapping 1-2 ingredients, so the original recipe doesn't completely change.
- Gluten-Free: Kelloggs Rice Krispies are not gluten free. However there are gluten free brown rice crisp cereals that you could use instead such as One Degree Organic. Check your protein powder label as well to ensure it's gluten-free.
- Dairy-Free: Choose a dairy-free protein powder like pea protein, rice protein, or another plant-based option to keep it dairy-free. Use dairy-free chocolate chips for the topping.
- Vegan: Follow the dairy free swaps and use maple syrup instead of honey.
- Nut-Free: If you can't have peanuts or tree nuts, swap out the peanut butter for sunflower seed butter or tahini. I love using tahini in sweet treats, so don't be afraid to try it! The flavor will be slightly different but still delicious.
Lower calorie version: Skip the chocolate topping. The bars are still delicious without it and you'll save about 25-30 calories per square.
Let me know in the comments if you do make any of these adjustments, I'd love to hear how it worked out! 💛
Equipment
8x6 inch or 1 litre/34 oz lunch box: This is the perfect size for making this recipe and I like to line the lunchbox with parchment paper for easy removal.
If you don't have a lunch box of this size you could use an 8x8 cake pan, however I'd recommend doubling the recipe given the larger size.
How to Make Protein Rice Crispy Treats
Below are the simple steps for how to make this recipe with visuals I hope are helpful! Don't forget to check out the recipe card at the bottom for the full recipe.

Step 1: Prepare your tin: Line a regular lunch box (8x6 inches) with parchment paper, leaving some extra over the sides to make it easier to lift the bars out later.

Step 3: Mix dry ingredients: In a large mixing bowl, combine the rice cereal and protein powder. Stir until evenly distributed.
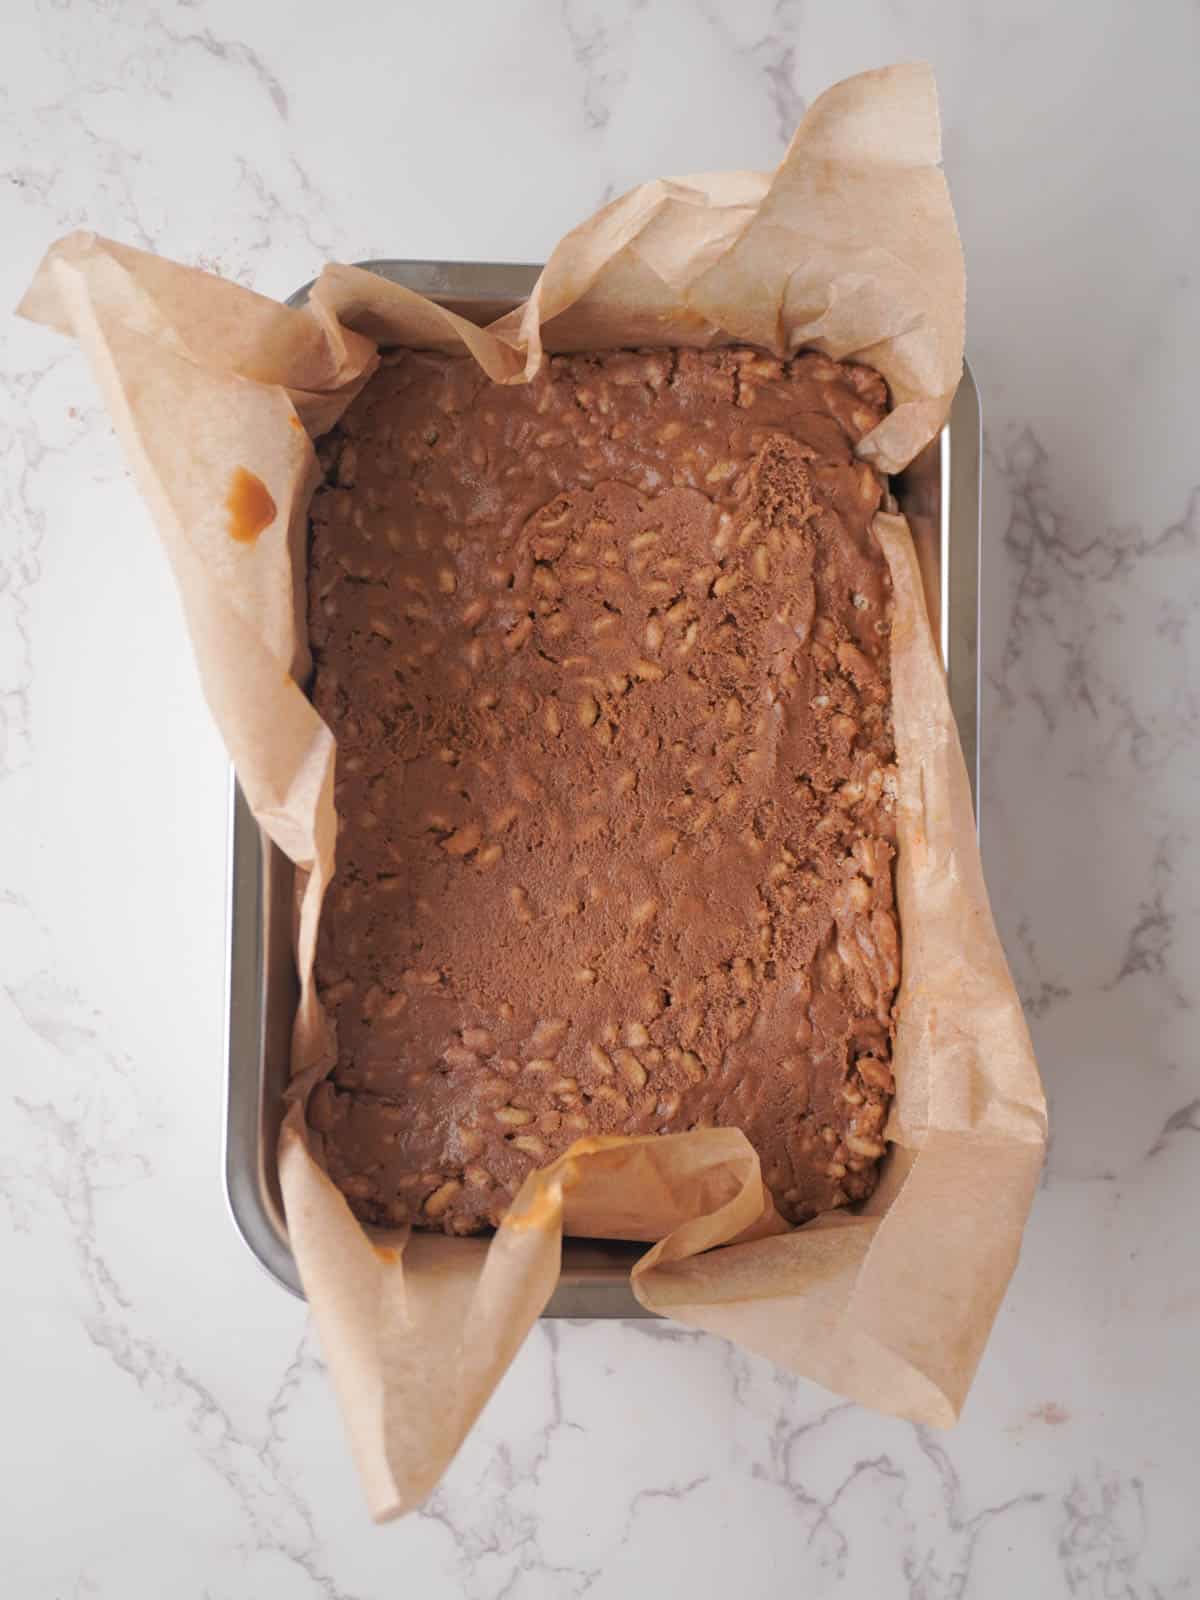
Step 5: Press into the prepared tin: Transfer the mixture to your lined lunch box or tin. Press it down firmly and evenly using the back of a spoon or your hands. Allow to set in the fridge for 2 hours or until the bars have set. Optional drizzle with melted chocolate before adding to the fridge.

Step 2: Mix the wet ingredients: Mix the honey and peanut butter in a bowl until well combined.
Pro tip: If your peanut butter is not very runny I'd recommend adding the honey and peanut butter into a small saucepan over a low heat. Gently melt the peanut butter and honey, stirring occasionally, until smooth and well combined.

Step 4: Combine the ingredients: Pour the melted peanut butter and honey mixture over the rice cereal and protein powder. Stir thoroughly until everything is evenly coated and sticking together.

Step 6: Slice and serve: Once firm, lift the bars out using the parchment paper, slice into squares, and enjoy! Store any leftovers in an airtight container.
Expert Tips for Making This Recipe
Mix thoroughly: Make sure the peanut butter and honey mixture completely coats all the cereal and protein powder. Any dry patches will make the bars crumbly.
Press firmly: Don't be shy about pressing the mixture firmly into the pan. The harder you press, the better the bars will hold together when you slice them.
Use runny peanut butter: If your peanut butter is too thick or dry (like from the bottom of the jar), warm it gently with the honey to get a smooth, pourable consistency.
Don't skip the chill time: While it's tempting to cut into them right away, letting the bars chill for a full hour ensures they hold together properly when sliced.
Cut with a sharp knife: Use a sharp knife and wipe it clean between cuts for the neatest squares. You can also dip the knife into a mug of hot water, wipe it dry, and then slice. The warmth helps the knife glide through without dragging.
Save This Recipe! 💌
Storage Tips
Fridge: Store in an airtight container at room temperature for up to 3 days, or in the fridge for up to a week. The bars will be firmer when refrigerated but will soften slightly at room temperature.
Freezer: For longer storage, cut the bars into squares, wrap individually in parchment paper, and freeze for up to 3 months. Perfect for meal prep! Let them thaw at room temperature for 10-15 minutes before eating, or enjoy them straight from the freezer for a firmer texture.
Serving Suggestions
Enjoy as a pre-workout or post workout snack. The combination of easily digestible carbs and protein makes these ideal about 30-60 minutes before a workout and a great option afterwards too.
Or simply crumble into my ninja creami protein ice cream for a protein-packed dessert.
Recipe FAQs
Add some high-protein toppings like crushed nuts (almonds, peanuts, pistachios), hemp seeds, chia seeds, or pumpkin seeds. You can sprinkle them over the melted chocolate before it hardens. You could also serve the bars crushed over a bowl of Greek yogurt for a protein-packed breakfast.
You can mix a tablespoon or two of cocoa powder into the bar mixture.
Yes! While I use chocolate whey protein powder, you can use vanilla, peanut butter-flavored, or even unflavored protein powder. Plant-based protein powders (pea, rice, hemp) also work, though they may make the bars slightly denser. If using unflavored protein, you might want to add 1-2 tablespoons of cocoa powder for chocolate flavor.
No, they don’t need to be. You can store them at room temperature in an airtight container. But they do hold their shape better when chilled, and they’ll last longer too. Keep them in the fridge for up to a week. Personally, I like storing them in the fridge because they’re firmer and so easy to grab as a quick snack.
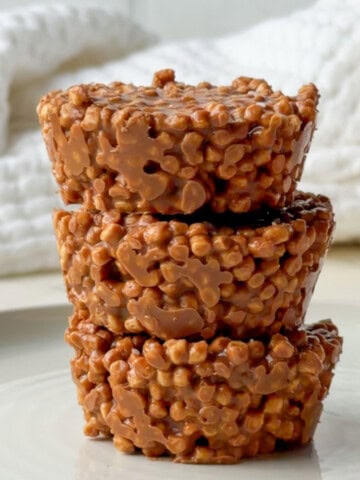
Related Recipes
If you love chocolatey, protein-packed treats, try these next:
📖 Recipe

Easy Protein Rice Krispie Squares (No-Bake)
Equipment
- 1 8x6 inch lunch box 1litre/34oz lined with parchment paper
Ingredients
For the protein bars:
- 70 g crisp rice cereal (2 cups) e.g., Rice Krispies or One Degree Organic for a gluten-free option
- 90 g chocolate protein powder (1 cup) the brand I used was Ascent Whey
- 250 g drizzly peanut butter (1 cup)
- 160 g honey (½ cup)
Chocolate topping
- 100 g chocolate or chocolate chips
- ½ teaspoon coconut oil
Instructions
- Prepare your tin: Line a regular lunch box (8x6-inch) with parchment paper, leaving some extra over the sides to make it easier to lift the bars out later.
- Mix the wet ingredients: Mix the honey and peanut butter in a bowl until well combined.250 g drizzly peanut butter (1 cup), 160 g honey (½ cup)
- Pro tip: If your peanut butter is not very runny I'd recommend adding the honey and peanut butter into a small saucepan over a low heat. Gently melt the peanut butter and honey, stirring occasionally, until smooth and well combined.
- Mix dry ingredients: In a large mixing bowl, combine the rice cereal and protein powder. Stir until evenly distributed.70 g crisp rice cereal (2 cups), 90 g chocolate protein powder (1 cup)
- Combine the ingredients: Pour the melted peanut butter and honey mixture over the rice cereal and protein powder. Stir thoroughly until everything is evenly coated and sticking together.
- Press into the prepared tin: Transfer the mixture to your lined lunch box or tin. Press it down firmly and evenly using the back of a spoon or your hands.
- OPTIONAL STEP: Prepare the chocolate topping: In a microwave-safe bowl or using the stovetop, melt the chocolate and coconut oil together until smooth. Pour the melted chocolate over the bars and spread it evenly across the top.
- Chill and set: Place the tin in the fridge for about 60 minutes, or until the bars and chocolate topping are set.
- Slice and serve: Once firm, lift the bars out using the parchment paper, slice into squares, and enjoy! Store any leftovers in an airtight container.
Video
Notes
Notes
Peanut butter consistency: Make sure your peanut butter is runny and smooth. If it's thick or dry, warm it gently with the honey before mixing. Storage: Store in an airtight container in the fridge for up to 1 week or wrap individual squares and freeze for up to 3 months. Top Tips:- Press the mixture firmly into the pan for bars that hold together well
- Mix thoroughly until no dry patches of protein powder remain
- Use a sharp knife and wipe clean between cuts for neat squares
- Let them chill for the full hour for best results

Comments
No Comments