


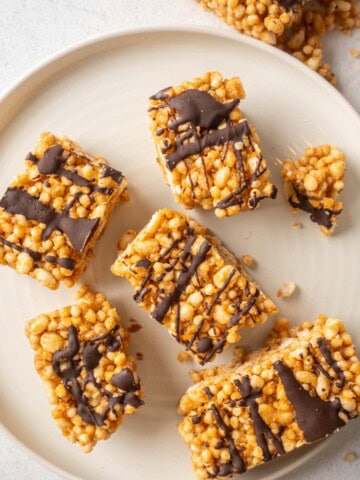
This single serve Weetabix Cookie recipe turns one Weetabix biscuit into a delicious high-protein cookie in just 10 minutes. It's the perfect grab-and-go breakfast, or quick snack when you want something sweet but nutritious, and you can customize it with whatever toppings you fancy.

A Quick Look At This Recipe
- ✅ Recipe Name: Single Serve Weetabix Cookie (High Protein)
- 🕒 Ready In: ~10-15 minutes total (5 minutes prep + 8-10 minutes cooking)
- 👪 Serves: 1
- 🍽 Calories: ~390 calories (without mix-ins), ~484 calories (with mix-ins)
- 🥣 Main Ingredients: Weetabix, protein powder, peanut butter, maple syrup, milk
- 📖 Dietary Info: Vegetarian, can be made vegan, high protein
- ⭐ Why You'll Love It: Quick single-serve treat that's high in protein and satisfies sweet cravings
As a looooong-term Weetabix lover, this Weetabix cookie has become my latest addiction. The best part is that when done right you can still achieve a soft gooey center and its single serve so portion control is made a lot easier!
Weetabix tends to be quite dry so this recipe took a lot of experimenting. I hope you love and appreciate it as much as I do.
If you love quick, high-protein snacks like this, you might also enjoy my protein crisp bars or chocolate peanut butter protein balls for more grab-and-go options.
Jump to:
- A Quick Look At This Recipe
- Why This Recipe Is Good for You (Nutrition Highlights)
- Key Ingredients
- Ingredient Substitutions
- Recipe Variations
- Equipment
- How To Make This Weetabix Cookie
- Expert Tips for Making This Recipe
- Serving Suggestions
- Storage
- Nutrition Notes
- FAQ
- More High-Protein Snack Recipes
- Want to Learn About Nutrition?
- 📖 Recipe
- 💬 Comments
Why This Recipe Is Good for You (Nutrition Highlights)
- High in protein – With protein powder and peanut butter, this little cookie delivers 33 grams of protein, making it a genuinely filling snack that keeps you satisfied
- Portion-controlled – It's a single serve, so you're not tempted to eat half a tray of baked goods (we've all been there!)
- Quick and easy – From start to finish, you're looking at about 10-15 minutes total with minimal clean-up
- Uses pantry staples – If you have Weetabix in the cupboard (or even if you've got those broken bits at the bottom of the box), you can make this
- Fiber-rich – Weetabix provides whole grain fiber to keep you satisfied
Key Ingredients
The complete ingredient list with measurements can be found in the recipe card below.
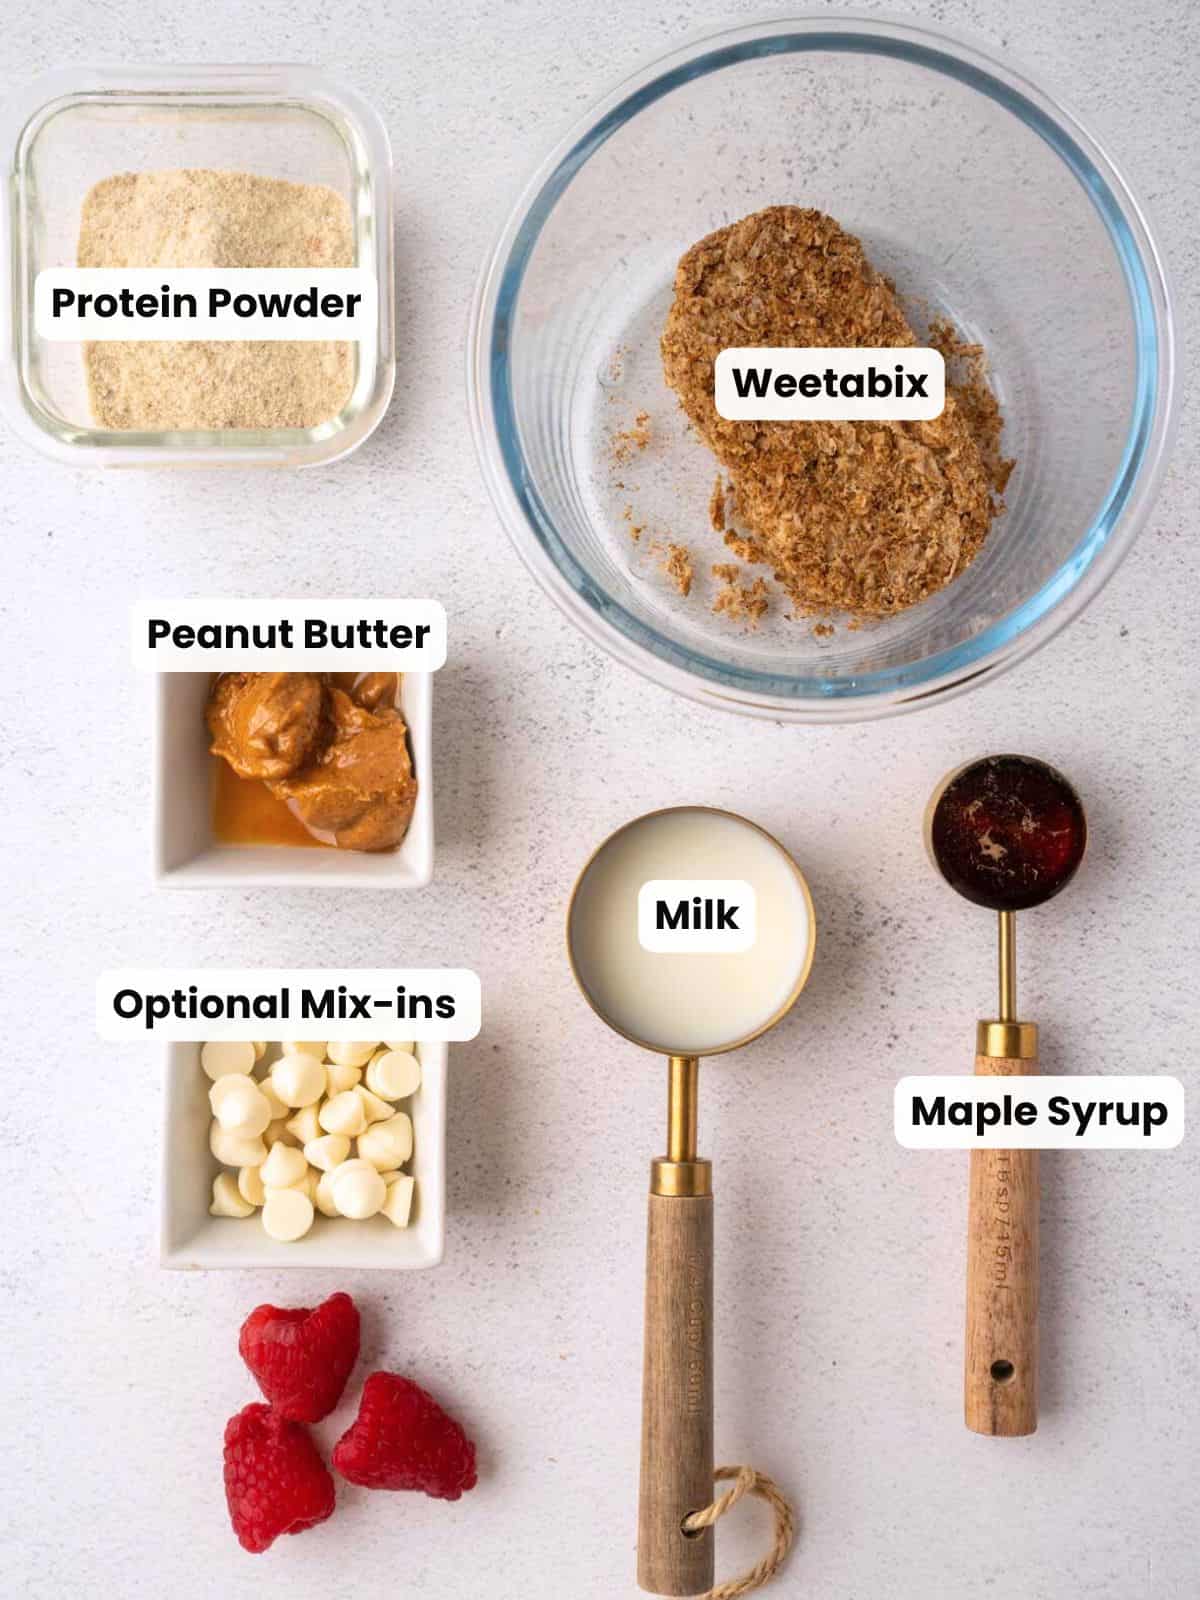
- Weetabix: Use one standard Weetabix biscuit. If you only have broken pieces at the bottom of the box, that works too, just measure out about 20 grams. You can also use any wheat biscuit or supermarket own-brand versions. Note: If you can’t find Weetabix (a UK-style wheat cereal that comes as rectangular “biscuits” in a yellow box), don’t worry. You can replace it with ¼ cup (about 20 to 25 grams) of any plain, unsweetened wheat-based cereal that crushes easily.
- Protein powder: I used vanilla protein powder (one scoop or 30 grams), but chocolate or unflavored would work too. Choose whey if you eat dairy, or use a plant-based protein powder if you're vegan. Different brands have different scoop sizes, so I recommend weighing it for consistency.
- Peanut butter: Use smooth peanut butter for the best texture. I recommend choosing a peanut butter that is 100% peanuts with maybe a bit of salt. Make sure to stir it well if there's oil separation at the top of the jar.
- Maple syrup: This adds natural sweetness and helps bind everything together. You can also use honey or agave syrup.
- Milk: Any milk works here; dairy, oat, almond, soy, or coconut. You need just 2-3 tablespoons to bring the dough together. Add it gradually because you want a thick, shapeable dough, not a wet batter.
- Optional mix-ins: I love adding chocolate chips, but you can also use dried fruit, chopped nuts, or even a dollop of my chia jam pressed into the center before baking.
Ingredient Substitutions
Here are some tips to help you adjust the recipe to suit your individual dietary needs and preferences. I only recommend swapping 1 - 2 ingredients, so the original recipe doesn't completely change.
- Vegan: Use a plant-based protein powder (pea, soy, or brown rice protein work well) and plant-based milk. Most peanut butter and maple syrup are naturally vegan, but double-check labels. Use vegan chocolate chips if adding those.
- Gluten-free: Weetabix is not gluten free so you would need to find another breakfast biscuit that is similar to weetabix but is certified gluten free. Remember to check all other ingredients too such as your protein powder. Some products although they may not obviously appear to contain gluten, if made in a facility that processes gluten there is a risk of cross-contamination.
- Nut-free: Swap peanut butter for sunflower seed butter or tahini. Make sure your protein powder doesn't contain nuts.
- Lower in sugar: Skip the chocolate chips. You could also use a sugar-free syrup if you prefer, though the texture may be slightly different.
- Higher in protein: I recommend serving the cookie with a dollop of greek yogurt! You could add more protein powder however you are risking the mixture becoming quite dry.
Please note: This recipe has not been tested with other substitutions or variations. If you replace or add any ingredients, please let me know in the comments below! I'd love to hear how it worked out! 💛
Recipe Variations
Once you have made this recipe a couple of times I urge you to get creative and try some of my other favorite flavor varieties below.
Chocolate lover's version: Use chocolate protein powder and add 20 grams of chocolate chips. You could even drizzle melted chocolate on top after cooking.
Berry blast: Add 15-20 grams of dried cranberries or blueberries to the mix. Fresh berries don't work as well because they release too much moisture.
Cinnamon roll inspired: Add ½ teaspoon of ground cinnamon to the dough and drizzle with a simple icing made from Greek yogurt, cream cheese and a touch of honey after cooking. Check out how I make this icing in my carrot cake baked oats recipe.
Peanut butter cup: Use chocolate protein powder, press a peanut butter cup into the center of the dough before cooking, and add extra chocolate chips on top.
Equipment
Air Fryer - I use my Ninja 10-in-1, which works as an air fryer, slow cooker, pressure cooker, and more. Since it covers so many functions in one machine, it saves a lot of space compared to having separate appliances. Any air fryer you have at home will work for this recipe.
You can also use a standard oven if you don't have an air-fryer.
Parchment paper or silicone mat: To prevent sticking. For the air fryer, cut a small circle of parchment paper to fit the basket. This also saves on clean up!
How To Make This Weetabix Cookie
Below are the simple steps for how to make this recipe with visuals I hope are helpful! Don't forget to check out the recipe card at the bottom for the full recipe.
- Preheat your air fryer to 320°F (160°C), or if using an oven, preheat to 350°F (175°C). Line your air fryer basket or a small baking sheet with parchment paper.
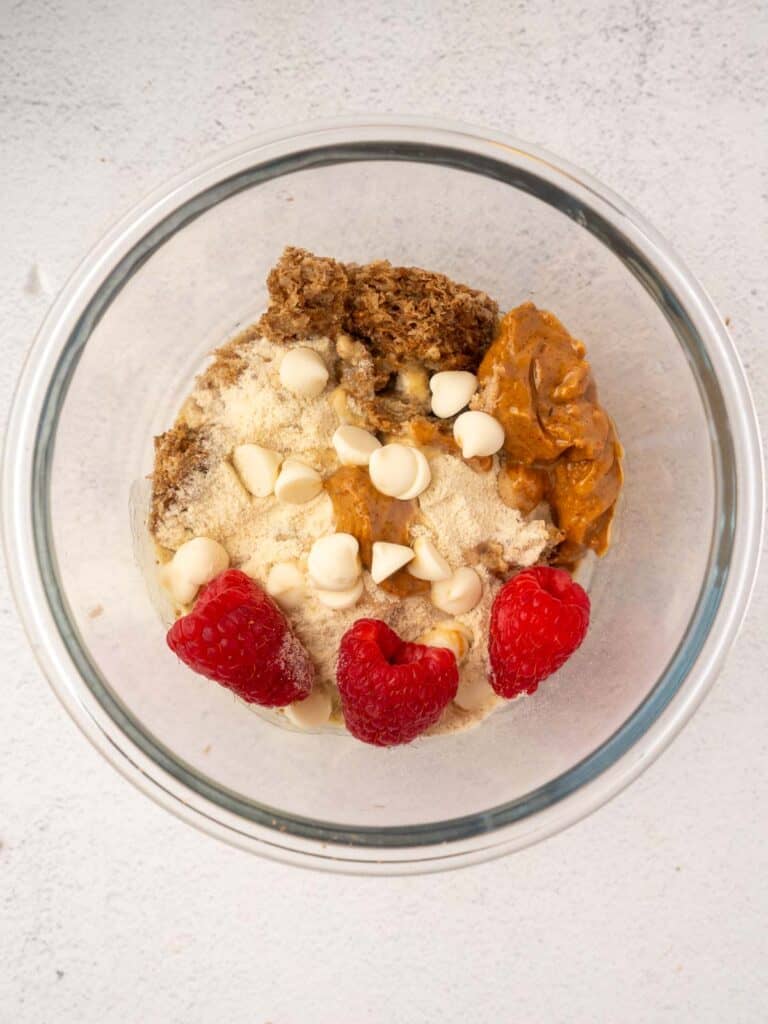
- Crumble the Weetabix into a small mixing bowl. Add the protein powder, peanut butter, maple syrup and any mix-ins your using. Mix everything together with a spoon. It will look dry at first.
- Gradually add the milk, one tablespoon at a time, mixing as you go. You want the mixture to form a thick, shapeable dough. Don't add too much milk or it will be too wet.
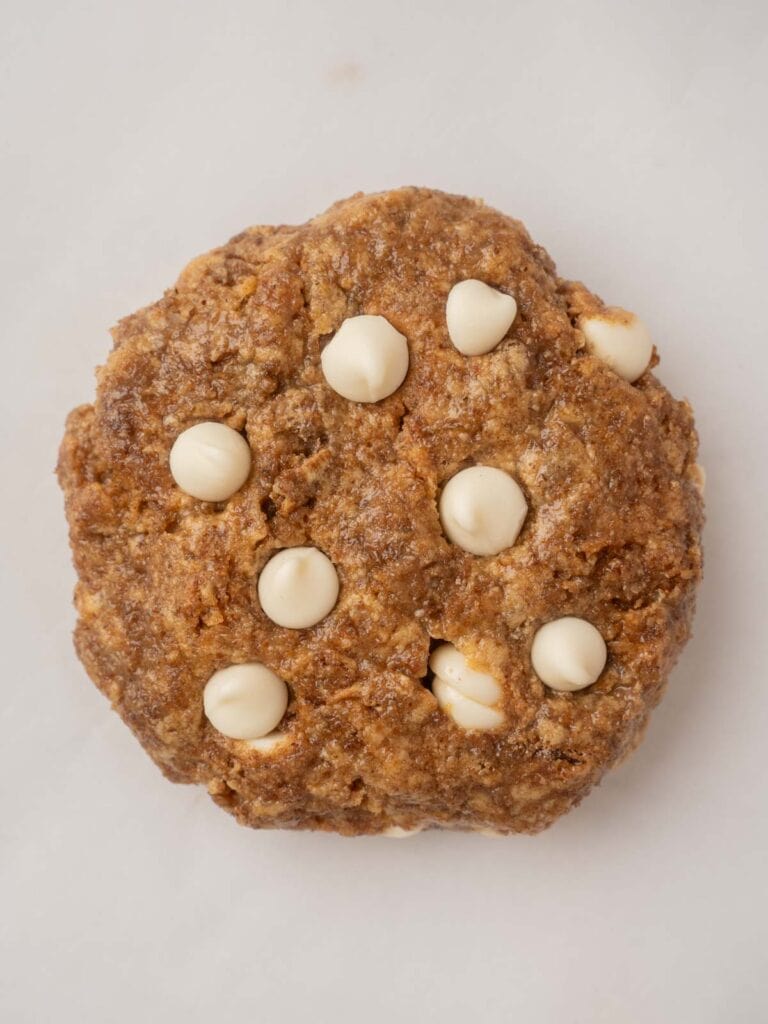
- Once you have a thick dough, shape it into a cookie shape with your hands. Add more chocolate chips into the top of the dough.
- Place the shaped cookie on the parchment paper in your air fryer basket or on your baking sheet.
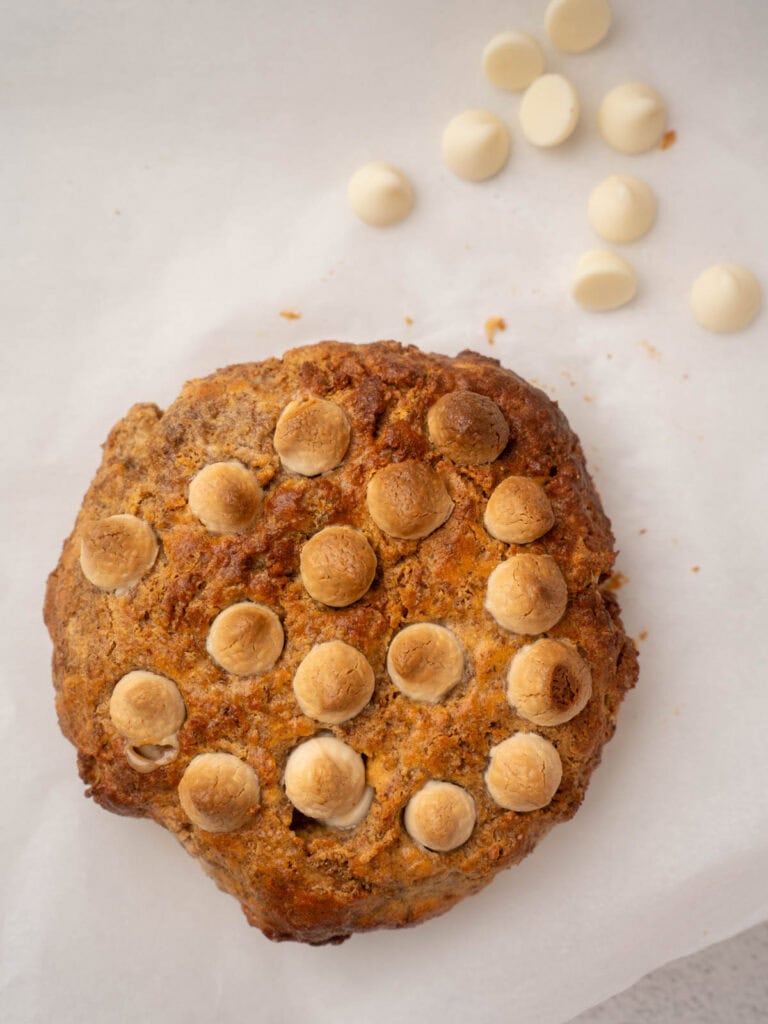
- Air fry at 320°F (160°C) for 8-10 minutes, or bake in the oven at 350°F (175°C) for 10-12 minutes, until the edges are golden and the top is just set. The cookie will still seem slightly soft when you remove it, but it will firm up as it cools.
Save This Recipe! 💌
Expert Tips for Making This Recipe
Don't add too much milk – This is the most common mistake. Add the milk gradually and stop when the dough just comes together. If it's too wet, it will spread flat and won't hold its cookie shape.
Shape it like a thick cookie – Don't make it too thin or it will dry out. Aim for about 2 centimeters thick (roughly ¾ inch).
Press toppings in firmly – If you're adding chocolate chips to the top, press them into the dough so they don't fall off during cooking.
It will seem soft when done – Don't overcook it trying to get it firm. The cookie firms up as it cools, and you want that slightly gooey center.
Adjust cooking time for your equipment – Air fryers vary in power, so keep an eye on it the first time you make this. Some air fryers run hotter and may need only 7-8 minutes. In the oven, start checking at 10 minutes.
Serving Suggestions
There are lots of ways to enjoy this Weetabix cookie:
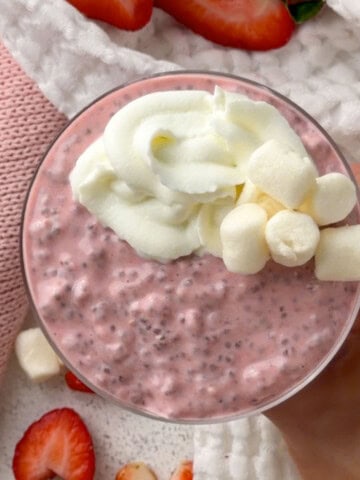
Warm with Greek yogurt – My favorite way to eat this is warm with a dollop of cold Greek yogurt on top. The contrast of temperatures is lovely, and you get even more protein.
With fresh berries – Serve alongside fresh strawberries, raspberries, or blueberries for extra vitamins and fiber.
As a breakfast cookie – Pair with a glass of milk or your morning coffee for a filling breakfast that's portable.
Crumbled over yogurt – Let it cool completely, then crumble it over a bowl of Greek yogurt with some fruit for a protein-packed yogurt bowl.
With a drizzle of nut butter – Warm it up and drizzle extra peanut butter or almond butter on top for an indulgent but nutritious treat.
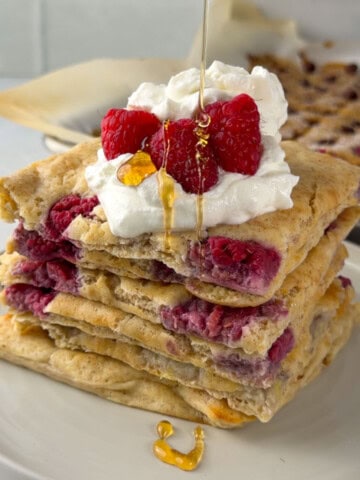
If you're looking for other high-protein breakfast ideas, try my scrambled oats or protein pancakes without protein powder next.
Storage
Room temperature: Once completely cooled, you can store the Weetabix cookie in an airtight container at room temperature for up to 2 days. It won't be quite as fresh as when it's freshly made, but it's still tasty.
Fridge: Store in an airtight container in the fridge for up to 4 days. Warm it up in the microwave for 15-20 seconds before eating to refresh the texture.
Freezer: These freeze brilliantly! Once completely cooled, wrap in parchment paper and then in foil, or place in a freezer-safe container. Freeze for up to 3 months. Defrost at room temperature for 30 minutes, or microwave from frozen for 30-40 seconds.
Reheating: The best way to reheat is in the air fryer at 300°F (150°C) for 2-3 minutes, or in the microwave for 20-30 seconds. The oven works too—about 5 minutes at 300°F (150°C).
Nutrition Notes
This single serve Weetabix cookie provides a good balance of protein, carbohydrates, and healthy fats, making it a genuinely satisfying snack rather than just empty calories.
The protein content (33 grams) helps keep you full between meals and supports muscle maintenance. This is particularly helpful if you're trying to increase your protein intake but find it tricky to fit in protein-rich foods throughout the day.
The whole grain Weetabix provides fiber, which supports digestive health and helps keep you satisfied. It also contains B vitamins and iron, as Weetabix is a fortified breakfast cereal.
One thing I love about this recipe is that it doesn't rely on artificial sweeteners or low-fat products to be "healthy." It's just real ingredients in sensible portions that taste good and nourish your body.
Nutrition information was calculated using the USDA FoodData Central database and verified brand data for accuracy. Estimates are based on the exact ingredients and amounts listed, so your numbers may vary slightly depending on the brands and measurements you use.
**For the nutrition analysis I used 2% milk and a whey protein powder. The analysis includes chocolate chips.
FAQ
Weetabix works best because of its texture and how it binds with the other ingredients. Yo could use own-brand versions of weetabix. Oat-based cereals won't work as well because they don't have the same binding properties.
You probably need a bit more milk. Add another ½ tablespoon (about 7-8 milliliters) at a time until the dough comes together. Different protein powders absorb liquid differently, so you may need slightly more or less milk than the recipe states.
You could, but the texture and protein content will be quite different. If you want to skip the protein powder, you could use 30 grams of oat flour instead, but be aware you'll only get about 7-8 grams of protein instead of 33 grams. You might also need to adjust the liquid slightly.
The edges should be golden and slightly firm, and the top should look set but may still seem soft when you gently press it. It will firm up as it cools—don't overcook it trying to get it completely firm or it will be dry. If you like yours a bit gooey in the middle, take it out at 8 minutes in the air fryer or 10 minutes in the oven.
Yes, but don't try to make one giant cookie! Shape each portion individually and cook them one at a time in the air fryer, or place multiple cookies on a baking sheet with space between them if using the oven.
More High-Protein Snack Recipes
If you love this recipe, you might also enjoy my snickers yogurt cup or high protein hummus for more easy, high-protein snacks.


Want to Learn About Nutrition?
Here are some nutrition education articles from a dietitian! And if you have any questions, feel free to reach out - I'm here to help.


📖 Recipe

Single Serve Weetabix Cookie Recipe (High Protein)
Equipment
- Airfryer or regular oven
- 1 small mixing bowl
- parchment paper
Ingredients
For the Weetabix Cookie:
- 1 Weetabix biscuit about 20 grams
- 30 grams vanilla protein powder 1 scoop I used vanilla whey protein
- 24 grams smooth peanut butter 1.5 tablespoons
- 20 grams maple syrup 1 tablespoon
- 30 to 45 milliliters milk 2 to 3 tablespoons add gradually - you may not need all of it
Optional toppings:
- 20 grams chocolate chips
- or other mix-ins of choice dried fruit, chopped nuts, etc.
Instructions
- Preheat your air fryer to 320°F or 160°C. If using an oven, preheat to 350°F or 175°C. Line your air fryer basket or a small baking sheet with parchment paper.
- Crumble the Weetabix: Break the Weetabix biscuit into small crumbs in a small mixing bowl. Use your hands or the back of a spoon to crush it into fine crumbs.
- Mix dry and wet ingredients: Add the protein powder, peanut butter, maple syrup and any mix-ins to the bowl with the Weetabix crumbs. Mix everything together with a spoon until combined. It will look quite dry at this stage.
- Add milk gradually: Add the milk one tablespoon at a time, mixing after each addition. Stop adding milk when the mixture forms a thick, shapeable dough. You want it to hold together when you press it, not be wet or runny. You may not need all 3 tablespoons of milk—this depends on your protein powder brand.
- Shape the cookie: Use your hands to shape the dough into a thick cookie shape, about 2 centimeters (¾ inch) thick. Optional: Press extra chocolate chips firmly into the top of the dough.
- Cook: Place the shaped cookie on the parchment paper in your air fryer basket or on your baking sheet.
- Air fryer: Cook at 320°F or 160°C for 8 to 10 minutes, until the edges are golden and the top is just set. I prefer to stop at 8 minutes because I like mine slightly gooey in the center.
- Oven: Bake at 350°F or 175°C for 10 to 12 minutes, until the edges are golden and the top is just set.
- Cool: Let the Weetabix cookie cool for at least 5 minutes before eating. It will be very hot inside and will firm up more as it cools. The texture improves after cooling slightly.
Save This Recipe! 💌
Notes
- Room temperature: Store in an airtight container for up to 2 days
- Fridge: Store in an airtight container for up to 4 days. Reheat for 15-20 seconds in the microwave before eating.
- Freezer: Wrap in parchment paper and foil, or place in a freezer-safe container. Freeze for up to 3 months. Defrost at room temperature for 30 minutes or microwave from frozen for 30-40 seconds.
Maria Lucey RD says
Great recipe, very quick so comes in handy when you want something quickly.