


This Baileys Cheesecake No Bake recipe is surprisingly easy to make with just a handful of ingredients. It's an indulgent, adults-only dessert that looks fancy but is actually very easy to make.
I make this recipe every Christmas when I’m hosting, and it never disappoints. It also holds really well, so you can make it 1–2 days ahead to save time on the day itself 🙌 - Sean

As an Irish dietitian, I can confidently say I know how to add Baileys Irish Cream liqueur to just about anything. Hot chocolate, desserts, even porridge on Christmas morning. But one of the very best ways to use it is in a classic no-bake Baileys cheesecake.
In Ireland, most of our cheesecakes are actually no-bake, and adding a splash of spirits to food is something we’re particularly good at.
There’s no oven required, no fussy water baths, and no worrying about cracks on top. Just a creamy, boozy filling sitting on a crunchy biscuit base.
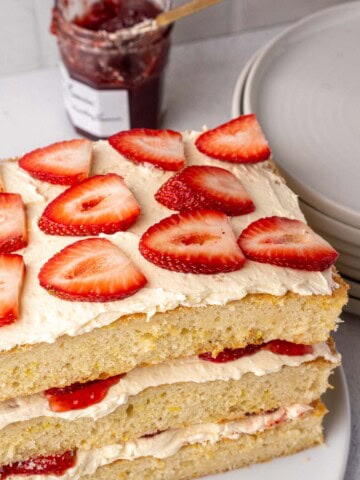
If you’re looking for other Irish-inspired recipes, I’d recommend trying my Guinness brown bread or traditional apple pie recipe next. And if you are just here for dessert, my strawberry layer cake is a must!
A Quick Look At This Recipe
✅ Recipe Name: Baileys Cheesecake No Bake Recipe
🕒 Ready In: ~30 minutes prep + minimum 2 hours chilling
👪 Serves: ~10-12 slices
🥣 Main Ingredients: Digestive biscuits, butter, cream cheese, double cream (or heavy cream), Baileys Irish Cream, icing sugar, milk chocolate
📖 Dietary Info: Vegetarian, contains alcohol (so adults only), can be made gluten-free with GF biscuits
⭐ Why You'll Love It: No baking required, comes together in minutes, perfect for make-ahead entertaining
Nutrition Highlights
When it comes to recipes on this blog, most of them are healthy, healthy-ish, or made with healthy swaps with the exception of my indulgent recipes category. This is very intentional because living a healthy lifestyle is all about balance, and there's a time and place for truly decadent foods and desserts. Not everything needs to be off-limits all the time.
For that reason, I don't focus on the nutritional calculations for these recipes. We don't need to know how many calories are in a slice of this cheesecake. It's best enjoyed intentionally, keeping an eye on portions and shared with people you love.
Food needs to fuel our soul too.
Recipe Ingredients
The complete ingredient list with measurements can be found in the recipe card below.

Digestive biscuits: These are the classic choice for a cheesecake base in the UK and Ireland. I like to use the brand Mcvities.
Butter: I use salted butter and the Irish brand Kerrygold is always my favorite. I may be bias but Irish produce is world-class!
Cream cheese: This is the star of the filling. Use full-fat cream cheese (I like the Philadelphia brand). Do not use a reduced fat cream cheese as it won't set properly, I've made this mistake in the past! Allow the cream cheese to come to room temperature before using to minimize lumps.
Double cream (or heavy cream): In the UK/Ireland, we use double cream, which has a higher fat content than single cream. If you're in the US, heavy cream is the close equivalent. I have used both heavy and double cream and they both worked out well. Again don't use a regular or lower fat cream as your cheesecake won't set properly.
Baileys Irish Cream: Use the original Baileys for the best flavor. Irish Baileys has that distinctive taste everyone recognizes.
Icing sugar (powdered sugar): This sweetens the filling and helps it set properly. Make sure it's sifted if it's clumpy.
Milk chocolate: You can use a bar of chocolate or chocolate chips.
Substitutions & Variations
Here are some tips to help you adjust the recipe to suit your individual dietary needs and preferences. I only recommend swapping 1-2 ingredients, so the original recipe doesn't completely change.
Gluten-free: Use gluten-free digestive biscuits or gluten-free graham crackers for the base. Everything else in the recipe is naturally gluten-free.
Different chocolate: Swap the milk chocolate for dark chocolate (70% cocoa) for a more sophisticated, less sweet version. You could also use something like Maltesers instead.
Alternative toppings: Instead of grated chocolate on top, try crushed Maltesers, chocolate buttons, Baileys truffles, or even a drizzle of salted caramel sauce.
Baileys flavors: Baileys comes in lots of different flavors now, like Original, Chocolate, Terry’s Chocolate Orange, and Salted Caramel, so you can easily switch things up and experiment with different versions of this cheesecake.
Chocolate Baileys Cheesecake: Add 2 tablespoons of cocoa powder to the biscuit base for an even richer chocolate flavor.
Coffee Baileys Cheesecake: Add 1 teaspoon of instant espresso powder to the cream cheese mixture for a coffee flavor that complements the Baileys.
This recipe has not been tested with other substitutions or variations. If you replace or add any ingredients, please let us know how it turned out in the comments below!
Save This Recipe! 💌
Equipment
9-inch springform tin: This is essential for easy removal. A springform tin has sides that unclip, making it much easier to get the cheesecake out without damaging it. Make sure it's at least 3 inches deep (a standard sandwich tin won't be deep enough and will overflow).
Electric hand mixer: While you can whisk by hand, an electric whisk makes the job so much easier and ensures the cream cheese mixture is smooth and lump-free. It also whips the cream to the right consistency much faster.
Rolling pin: This is helpful for crushing the digestive biscuits. I highly recommend using my plastic bag method which I explain in the steps below as it keeps the crumbs contained and avoids mess.
How To Make a No Bake Baileys Cheesecake
Recipe Video
Step by Step Instructions
Don't forget to check out the recipe card at the bottom for the full recipe.
Step 1: Line your springform tin with parchment paper. To do this, place the parchment paper over the base of the tin, then clip the sides together around it. This creates a non-stick base that makes removing the cheesecake so much easier later.

Step 2: Crush the digestive biscuits. The easiest way to do this is to put them in a large plastic bag (a freezer bag works well) and bash them with a rolling pin until they're fine crumbs. This method keeps the crumbs contained and avoids mess all over your kitchen.

Step 3: Melt the butter in a pan or in the microwave (30-40 seconds). Remove from the heat and stir in the crushed biscuits. Mix well until all the biscuits have absorbed the butter—the mixture should look like wet sand.

Step 4: Press the biscuit mixture into the bottom of your lined springform tin. Use the back of a spoon or the bottom of a glass to press it down firmly and evenly. Place in the fridge for at least 1 hour to set while you make the filling.

Step 5: In a large bowl, beat the cream cheese, Baileys, and icing sugar together with an electric hand whisk until smooth and well combined. Make sure there are no lumps—this is why room temperature cream cheese is so important.

Step 6: In a separate bowl, whip the double cream (or heavy cream) until it forms stiff peaks. The cream should be thick enough that you can turn the bowl upside down and nothing falls out. Be careful not to over-whip, or it can split.

Step 7: Gently fold the whipped cream and grated (or chopped) chocolate into the cream cheese mixture. Use a spatula and fold carefully to keep as much air in the mixture as possible. The filling should be light and fluffy.

Step 8: Remove the biscuit base from the fridge and spoon the filling evenly over the top. Smooth the surface with a spatula or the back of a spoon.

Step 9: Decorate as desired with grated chocolate, Baileys truffles, maltesers, or whatever toppings you like. Refrigerate for at least 2-3 hours (or overnight for best results) until the filling is completely set.
Once set, remove the cheesecake from the springform tin.

Additional Tips For Making This Recipe
Use room temperature cream cheese: This is crucial. Cold cream cheese will be lumpy and won't mix smoothly with the other ingredients. Take it out of the fridge at least 30 minutes before you start (or 1-2 hours if your kitchen is cold).
Don't over-whip the cream: Whip the cream just until it holds stiff peaks. If you over-whip, it can become grainy or even turn to butter. Stop as soon as you can turn the bowl upside down without the cream falling out.
Fold gently: When you're combining the whipped cream with the cream cheese mixture, fold gently with a spatula. Stirring too vigorously will knock out all the air and make your filling dense instead of light and fluffy.
Line your tin properly: Lining the springform tin with parchment paper makes removal so much easier. Put the parchment over the base, then clip the sides around it. This creates a non-stick surface.
Chill overnight for best results: While 2-3 hours is the minimum, overnight chilling gives you the best texture. The cheesecake will be firmer and easier to slice cleanly.
Crush biscuits in a bag: Using a plastic bag and rolling pin keeps the crumbs contained and your kitchen clean.
Chocolate options: I actually prefer finely chopping the chocolate rather than grating it. The small chunks add nice texture to the filling. If you want a smoother filling, grate it. If you want little pockets of chocolate, chop it finely.
Warm your knife for clean slices: When you're ready to serve, dip your knife in hot water, dry it, then slice. Wipe the knife clean between each slice and re-warm it. This gives you beautifully clean edges.
Storage & Serving Tips
Fridge: Store the cheesecake in the springform tin covered with cling film or a dinner plate. Make sure the covering doesn't touch the surface of the cheesecake. It will keep for up to 3 days in the fridge. The results are much better if it's had time to chill overnight before serving.
Make-ahead: You can make the cheesecake 1-2 days before you need it and keep it in the fridge. I recommend keeping it within the springform tin. Just add the chocolate topping and decorations on the day of serving for the freshest look.
Remove from tin close to serving time: Once you take the cheesecake out of the springform tin, it will start to lose its shape a little at room temperature. I recommend removing it from the tin no more than 2-3 hours before serving and keeping it in the fridge on a plate or serving platter.
Serving temperature: This cheesecake is best served cold, straight from the fridge. The filling should be firm and set, not soft or runny.

FAQS
This usually happens if the cream wasn't whipped enough. The cream needs to be whipped to stiff peaks (thick enough that you can turn the bowl upside down and nothing falls out). Also make sure you're chilling the cheesecake for at least 3 hours. Finally, don't use reduced fat cream cheese.
Yes, but why? 😅 The Baileys is what gives this cheesecake its distinctive flavor. If preferred you could try using a non-alcoholic Irish cream alternative. I haven't tested this myself, so I can't guarantee how it will turn out.
Yes you can. I have experimented with different biscuit bases over the years including chocolate chip cookies, oreos and chocolate digestives. All are nice but I find the classic digestive always wins out in the end as you don't want to overpower the rest of the cheesecake.
I have not done this but if you wanted you could freeze the base. However I don't recommend freezing the creamy filling.
📖 Recipe

Baileys Cheesecake No Bake Recipe
Equipment
Ingredients
Base:
- 160 g butter I use unsalted
- 400 g digestive biscuits
Filling
- 600 g cream cheese at room temperature
- 40 mls Baileys Irish Cream
- 100 g icing sugar
- 300 mls double cream or heavy cream cold
- 100 g milk chocolate grated or finely chopped
To Decorate
- Grated chocolate, Baileys truffles, Maltesers, chocolate buttons, or toppings of your choice
Instructions
- Line your springform tin: Place a sheet of parchment paper over the base of a 9-inch springform tin, then clip the sides together around it. This makes removal much easier later.
- Crush the biscuits: Place the digestive biscuits in a large plastic bag and bash them with a rolling pin until they form fine crumbs. This keeps the mess contained.400 g digestive biscuits
- Make the base: Melt the butter in a pan over low heat or in the microwave (30-40 seconds). Remove from heat and add the crushed biscuits. Mix well until all the biscuits have absorbed the butter and the mixture looks like wet sand.160 g butter
- Press into tin: Press the biscuit mixture firmly and evenly into the bottom of your lined springform tin. Use the back of a spoon or the bottom of a glass to compact it. Place in the fridge for at least 1 hour to set.
- Make the filling: In a large bowl, beat the cream cheese, Baileys, and icing sugar together with an electric hand whisk until smooth and completely lump-free. Make sure the cream cheese is at room temperature for best results.600 g cream cheese, 40 mls Baileys Irish Cream, 100 g icing sugar
- Whip the cream: In a separate bowl, whip the cold double cream (or heavy cream) with an electric whisk until it forms stiff peaks. The cream should be thick enough that you can turn the bowl upside down and nothing falls out.300 mls double cream or heavy cream
- Fold together: Gently fold the whipped cream and grated or finely chopped milk chocolate into the cream cheese mixture using a spatula. Fold carefully to keep as much air in the mixture as possible.100 g milk chocolate
- Assemble: Remove the biscuit base from the fridge and spoon the filling evenly over the top. Smooth the surface with a spatula.
- Chill: Refrigerate for at least 3 hours, or overnight for best results, until the filling is completely set.
- When ready to serve remove from the tin and decorate with grated chocolate, Baileys truffles, or your chosen decoration.Grated chocolate, Baileys truffles, Maltesers, chocolate buttons, or toppings of your choice
Notes
- Fridge: Store covered in the fridge for up to 3 days. Keep it in the springform tin if possible, covered with cling film or a dinner plate (make sure it doesn't touch the surface).


Sean says
Make this every Christmas and love it!
Maria Lucey RD says
So happy to hear this! It truly is a Xmas classic!